Developer Offer
Try ImaginePro API with 50 Free Credits
Build and ship AI-powered visuals with Midjourney, Flux, and more — free credits refresh every month.
Master Google Photos AI Edits After the Redesign
Google Photos recently celebrated its 10th anniversary with a major overhaul of its editing tools. If you've opened the app recently and felt a bit lost, you're not alone. The familiar Magic Editor, first introduced with the Pixel 8 series, has been deconstructed into a suite of powerful, distinct AI tools. But don't worry—all the magic is still there, just in new places.
This guide will help you navigate the redesigned interface and master the incredible AI features now available in Google Photos. The best part? Many of these tools are now free for anyone with a Google account, no Pixel phone or subscription required. Let's get started!
Navigating the New Google Photos Editor
The updated editing interface, rolling out with the latest versions of the app on Android, presents a new toolbar when you select a photo and tap Edit. You'll find tabs for Auto, Actions, Markup, Filters, Lighting, and Color. If you're ever struggling to find a specific tool, the new Search button is your best friend.
So, where did Magic Editor go? Its core functions have been given their own identities. When you tap or circle an object in your photo, you'll see options for Erase, Move, and Reimagine. The old object removal is now handled by the more powerful Magic Eraser, while the generative capabilities are split between Move and Reimagine. The Auto frame feature has been tucked away inside the Crop tool under the Actions tab.

Effortlessly Remove Objects with Magic Eraser
Magic Eraser is your go-to tool for cleaning up photos by removing distracting objects or people. You can access it in two ways.
- Open Google Photos and choose a picture.
- Tap the Edit button.
- Go to the Actions tab and select Magic Eraser. Alternatively, you can simply tap or circle the object you want to remove and then select Erase from the pop-up menu.
- If needed, refine your selection by circling or tapping on the object.
- Tap Erase to watch the object disappear.
- Press the checkmark to confirm the change.
- Tap Save as copy to keep your newly edited photo.

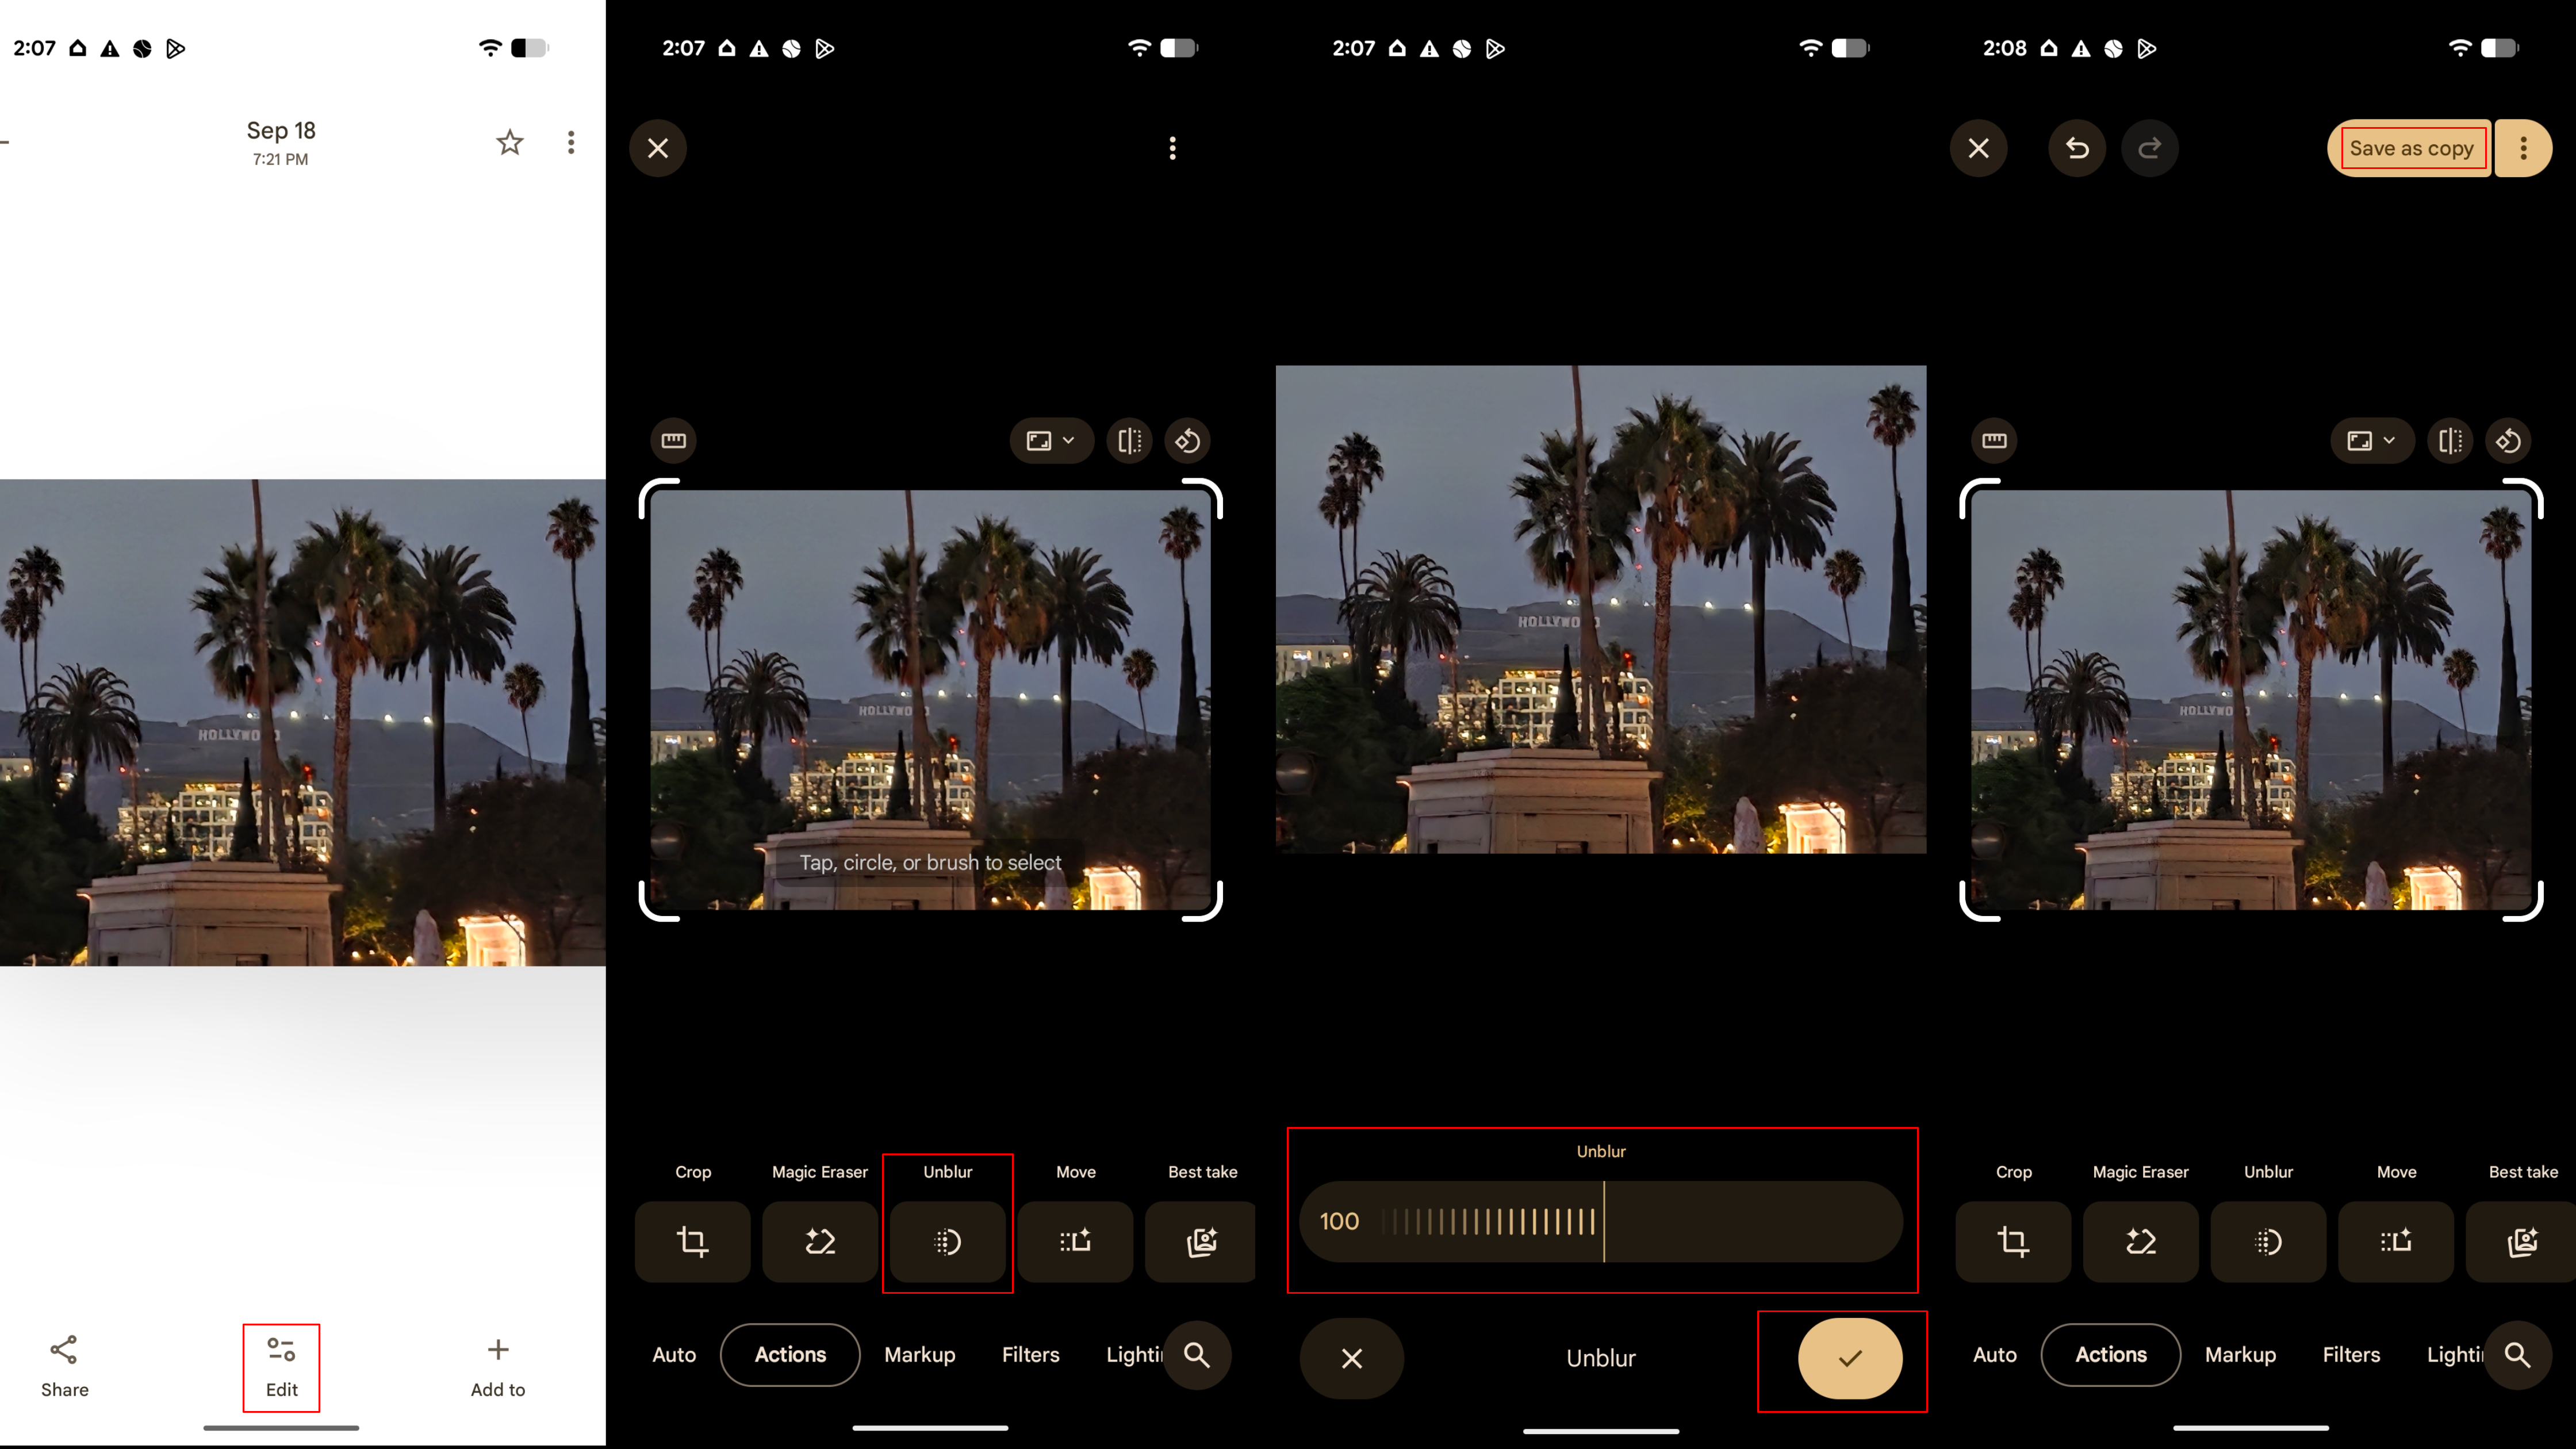
Sharpen Your Shots with Photo Unblur
Have an old photo that's slightly blurry? Photo Unblur uses AI to sharpen images, working especially well on pictures with motion blur. Here’s how to use it.
- Open Google Photos and select a blurry photo.
- Tap Edit.
- Navigate to the Actions tab and choose Photo Unblur.
- The tool will automatically process the image. You can use the slider to adjust the intensity.
- Tap Save as copy to add the sharpened image to your gallery.
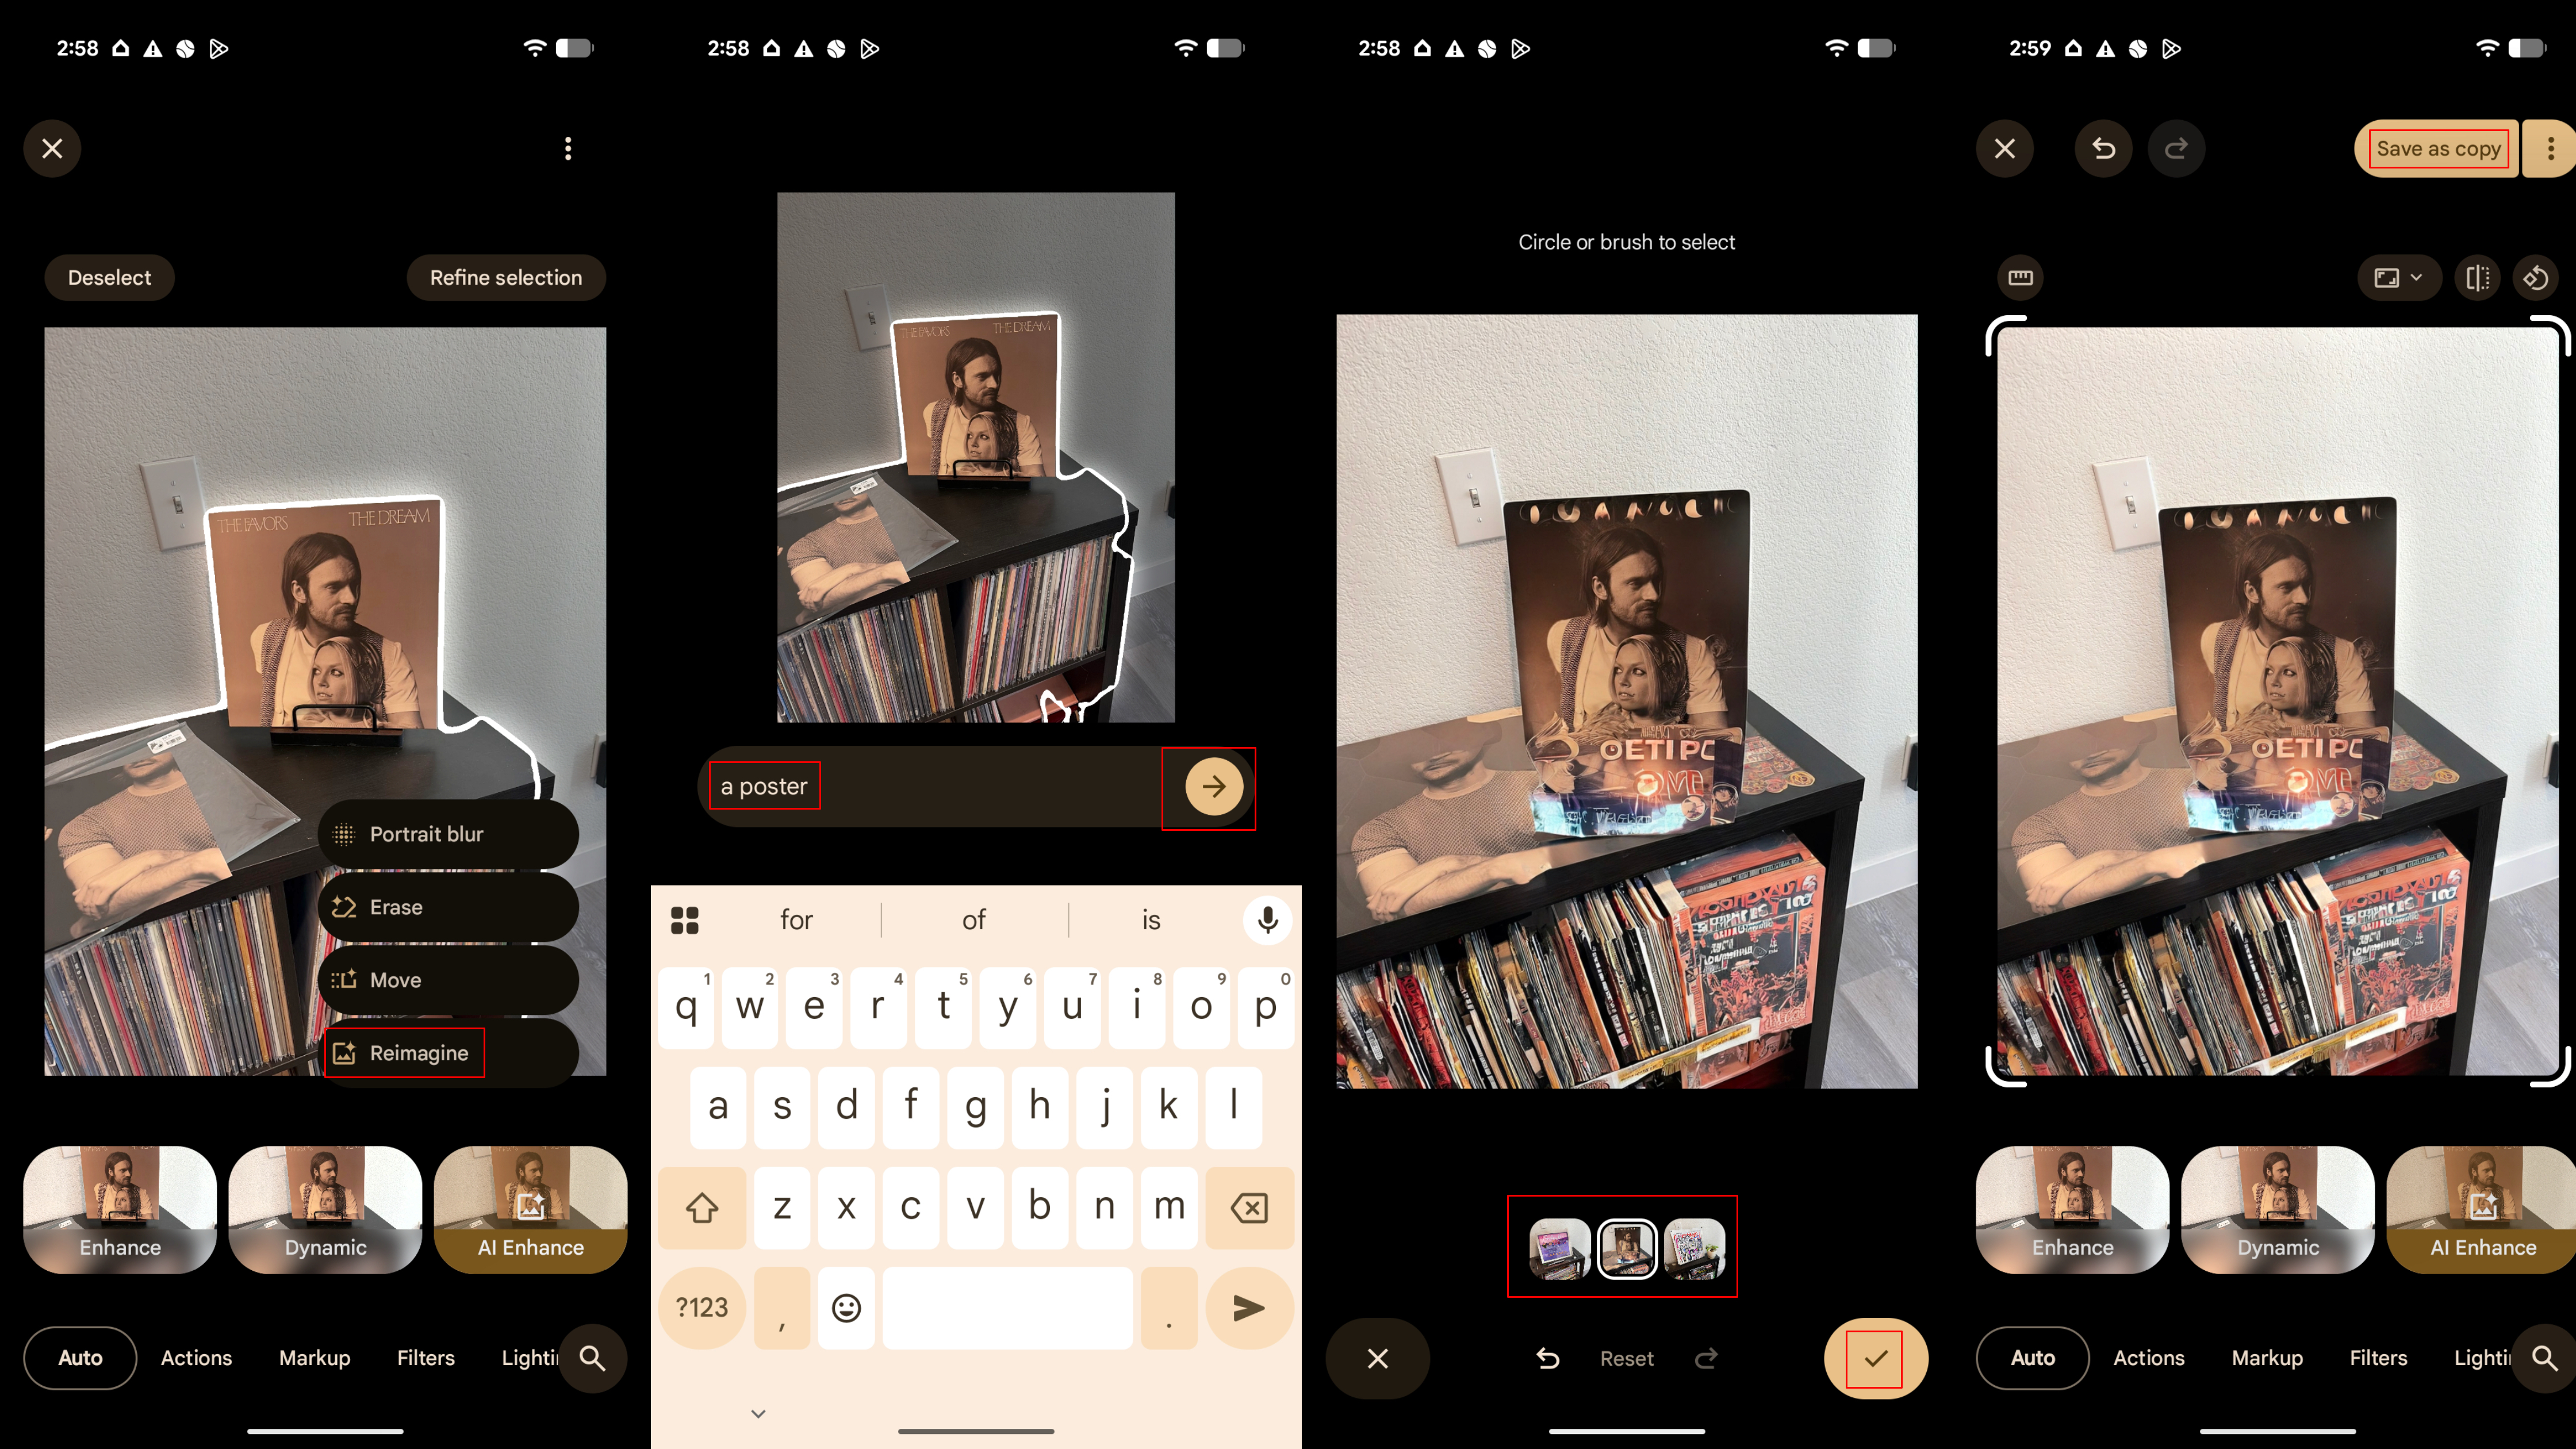
Transform Images with Generative AI Reimagine
Reimagine is a true generative AI tool that can completely alter parts of your photo. It doesn't just remove objects; it uses generative fill to modify and add new elements based on your text prompts.
- In the Google Photos app, open a photo and tap Edit.
- Tap or circle an area you want to change, then select Reimagine.
- Type a descriptive prompt into the text box (e.g., "a field of wildflowers" or "a dramatic, cloudy sky").
- Press the arrow to generate options.
- Select your favorite generated image and tap the checkmark.
- Press Save as copy to save your creation.
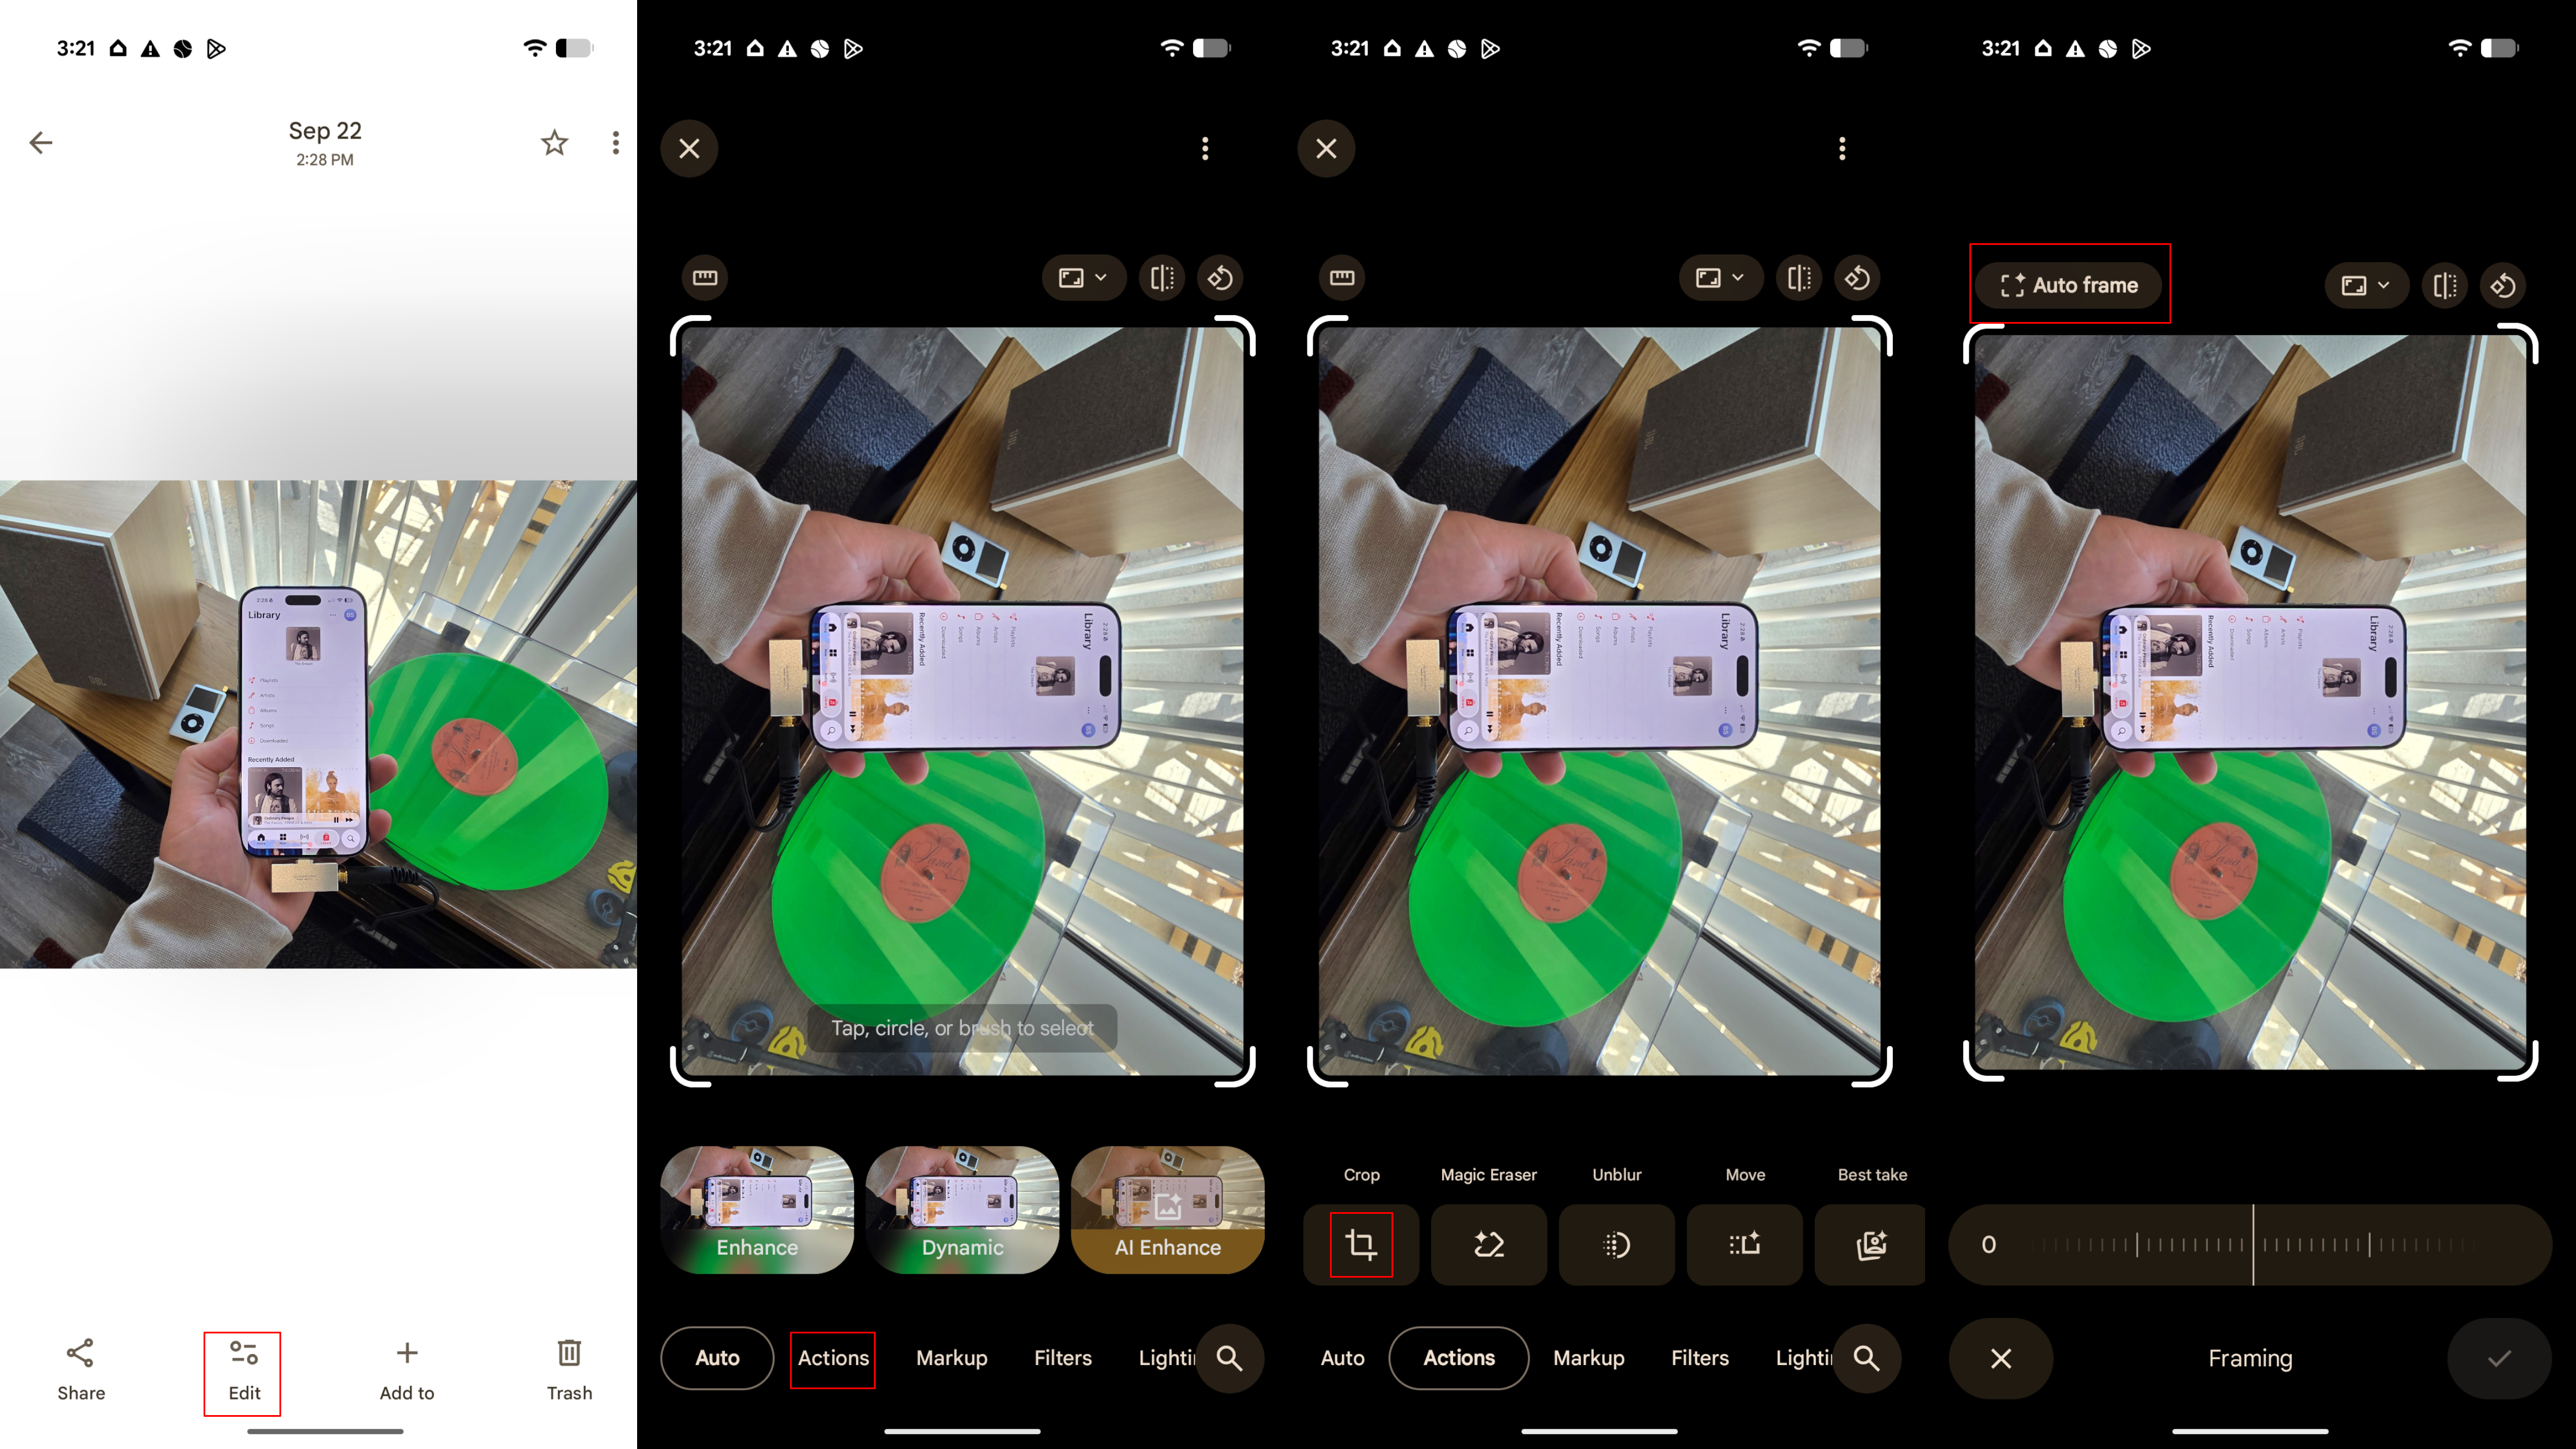
Find the Perfect Composition with Auto Frame
If you're not sure about the best way to crop a photo, let Auto Frame handle it. This feature suggests professional-looking crops and frames for your image.
- With a photo open in the Edit interface, go to the Actions tab.
- Select Crop.
- Tap the Auto frame button.
- Google Photos will generate several cropping options. Select the one you like best.
- Tap the checkmark to apply it.
- Press Save as copy to save the perfectly framed photo.
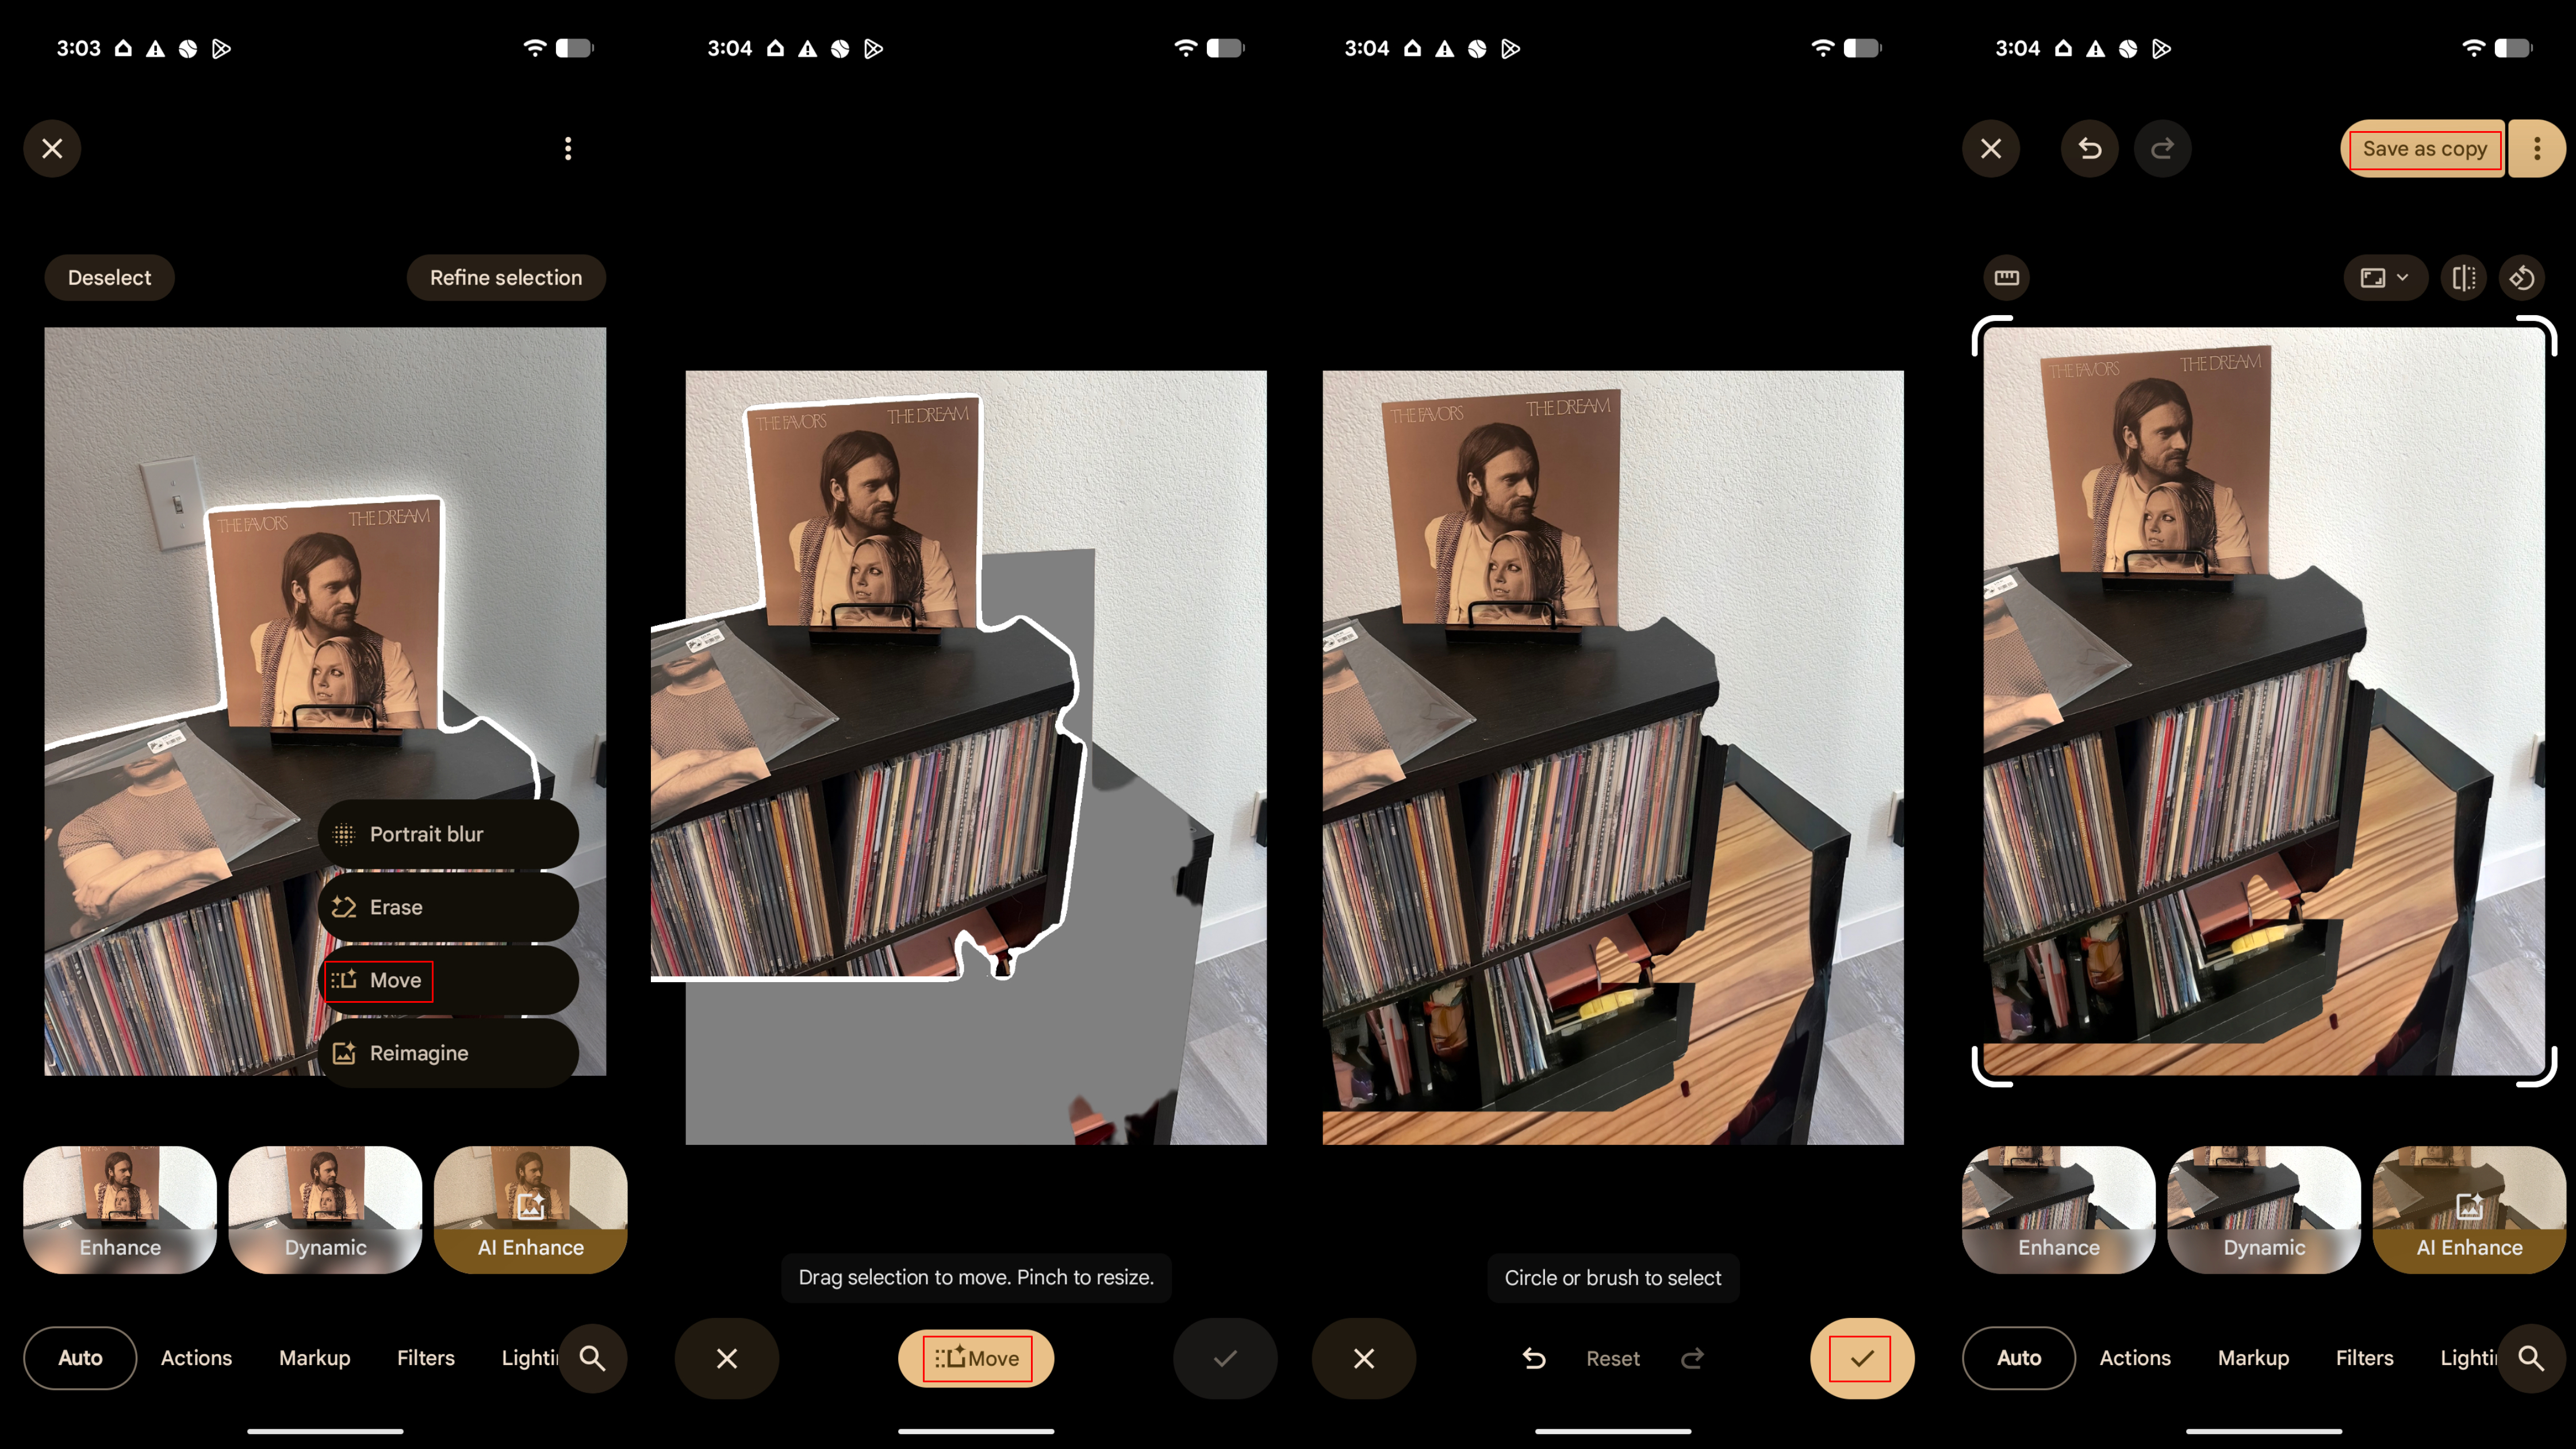
Reposition Subjects with the Move Tool
The Move tool does exactly what it says: it lets you select an object and move it to a different spot in the photo. AI then intelligently fills in the background where the object used to be.
- After tapping Edit on a photo, tap or circle an object and select Move.
- Touch and hold the selected object to drag it to a new location. You can also pinch to resize it.
- Once you're satisfied, tap Move to let the AI process the change.
- Press the checkmark to accept the result.
- Tap Save as copy to save the rearranged photo.
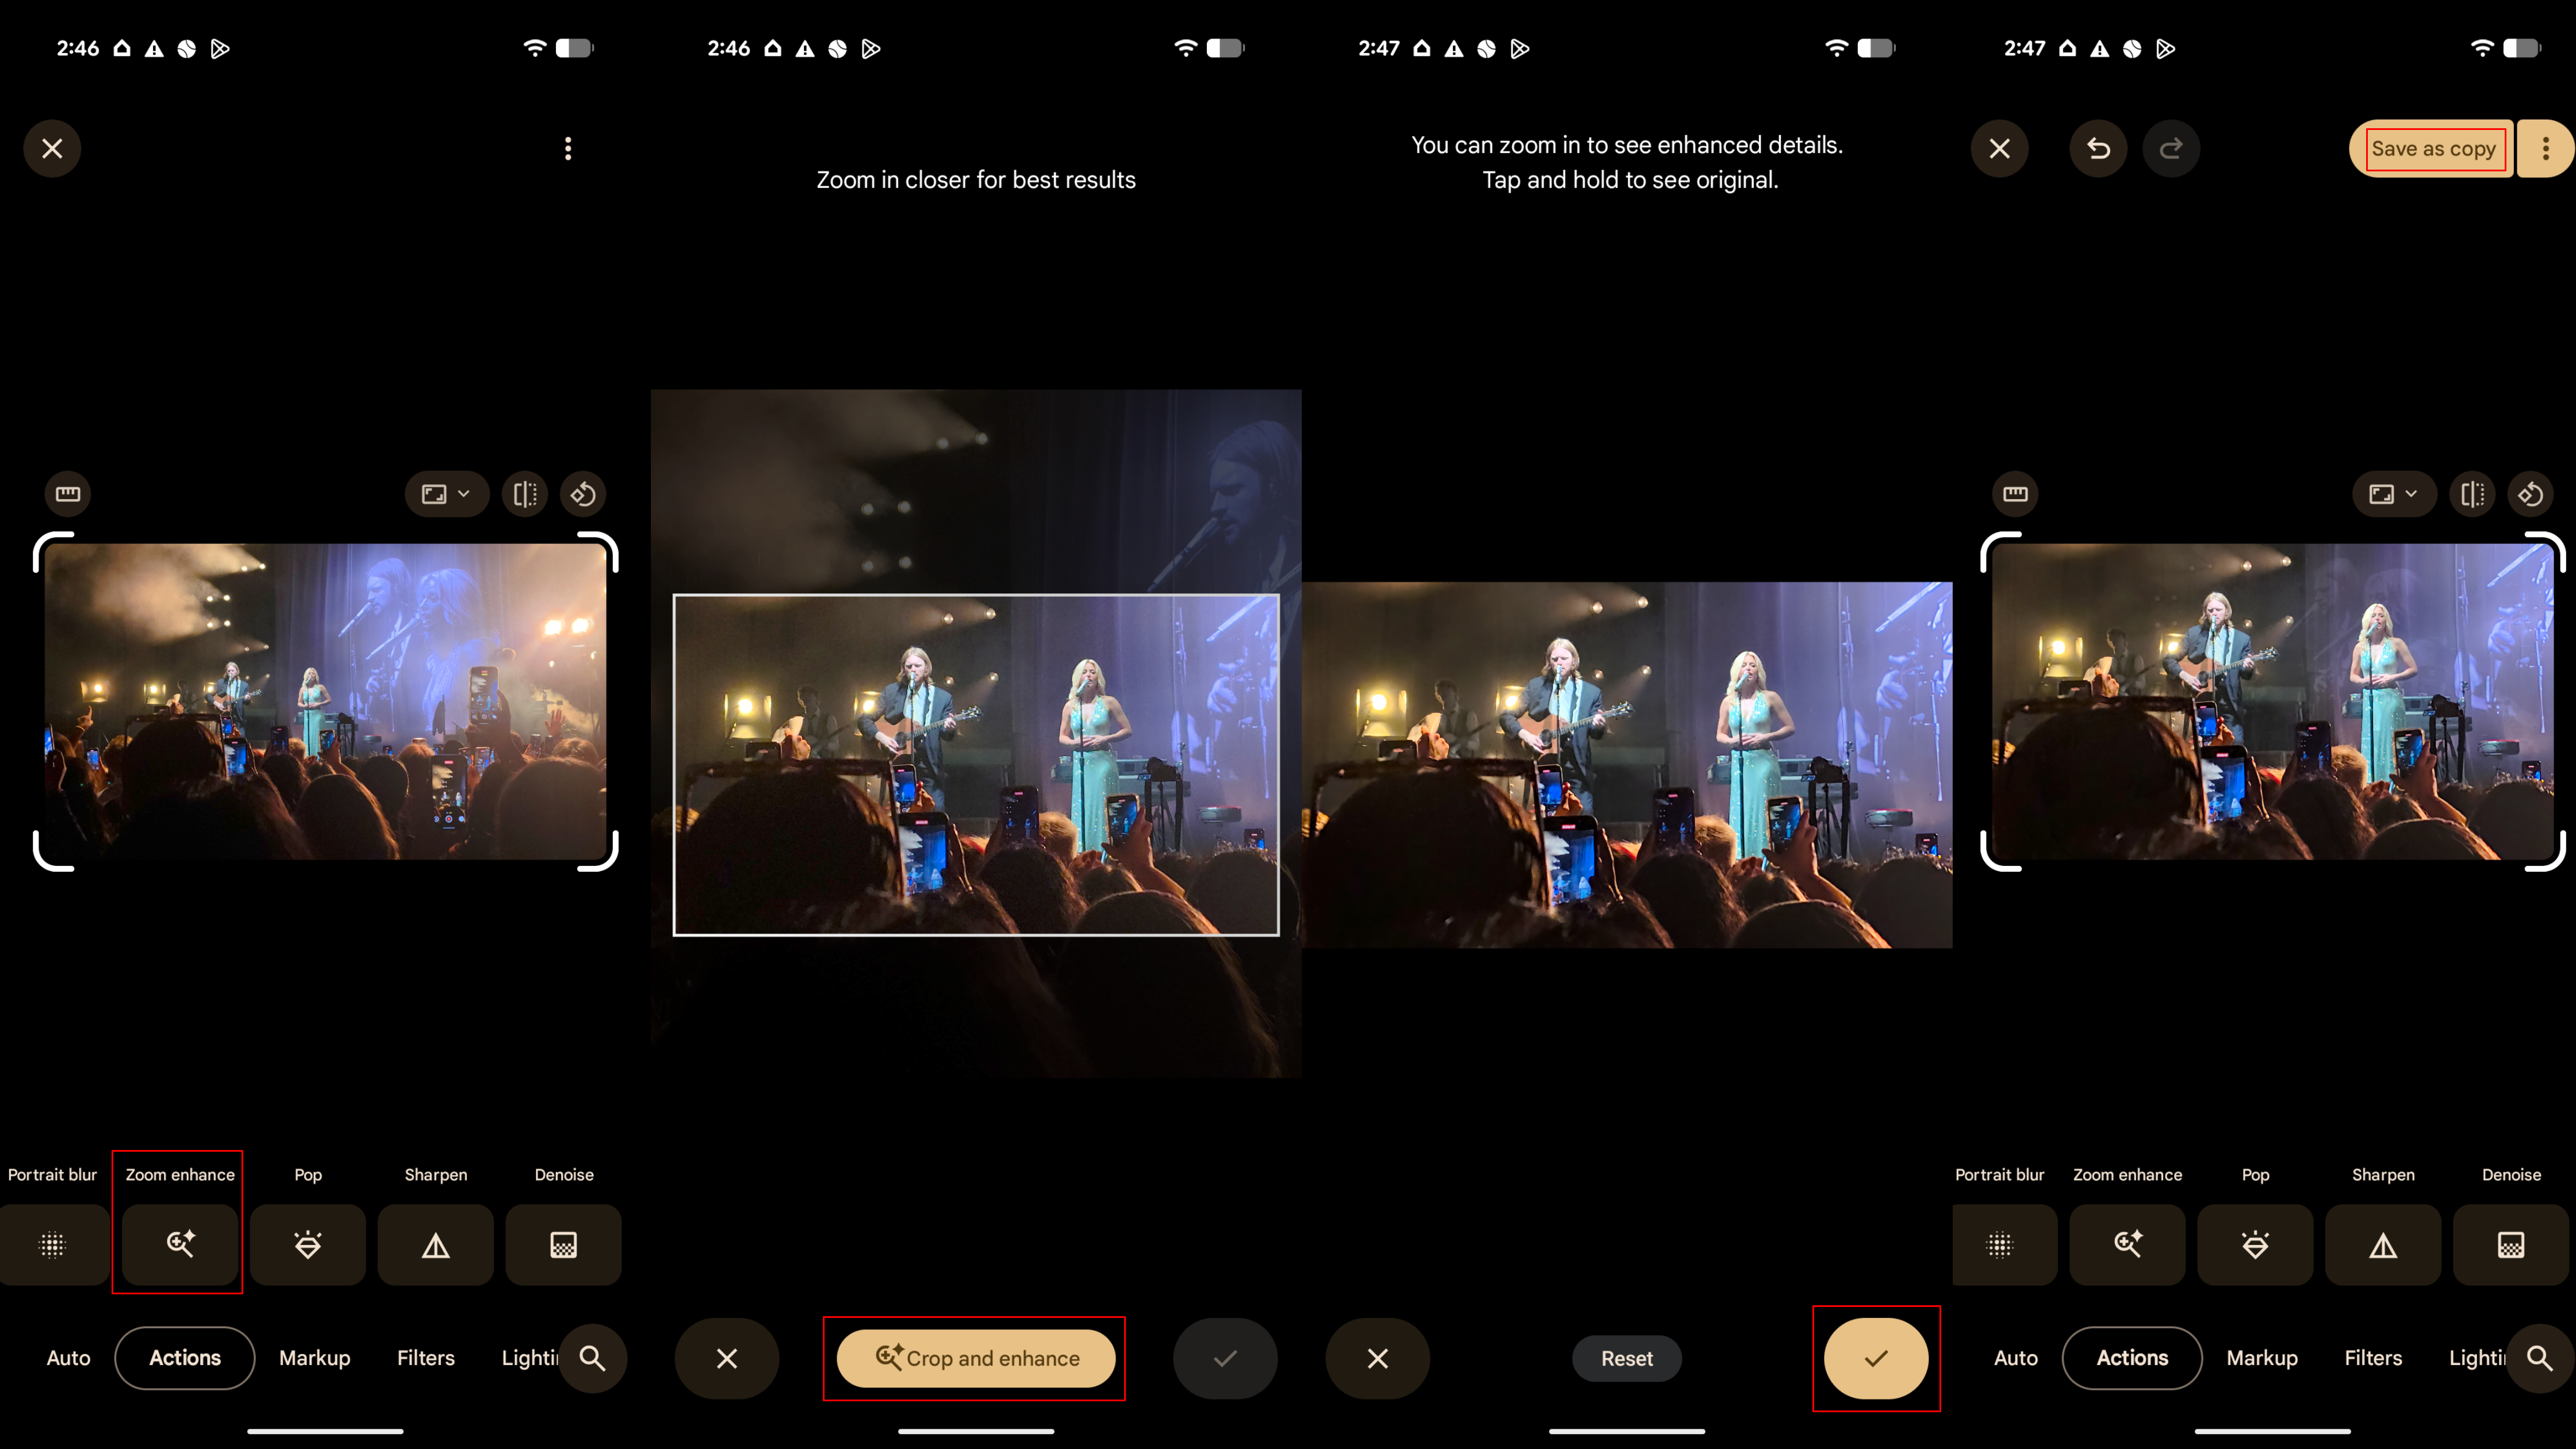
Get Closer with Zoom Enhance
Zoom Enhance is designed to combat the quality loss that comes with digital zoom. It uses AI to enhance details, remove grain, and reduce artifacts when you crop in on a photo.
- In the editor, go to the Actions tab and select Zoom Enhance.
- Zoom into the area of the photo you want to focus on.
- Tap Enhance Details.
- After the AI works its magic, you can tap and hold the image to compare it with the original.
- Tap the checkmark to finalize the crop.
- Press Save as copy.
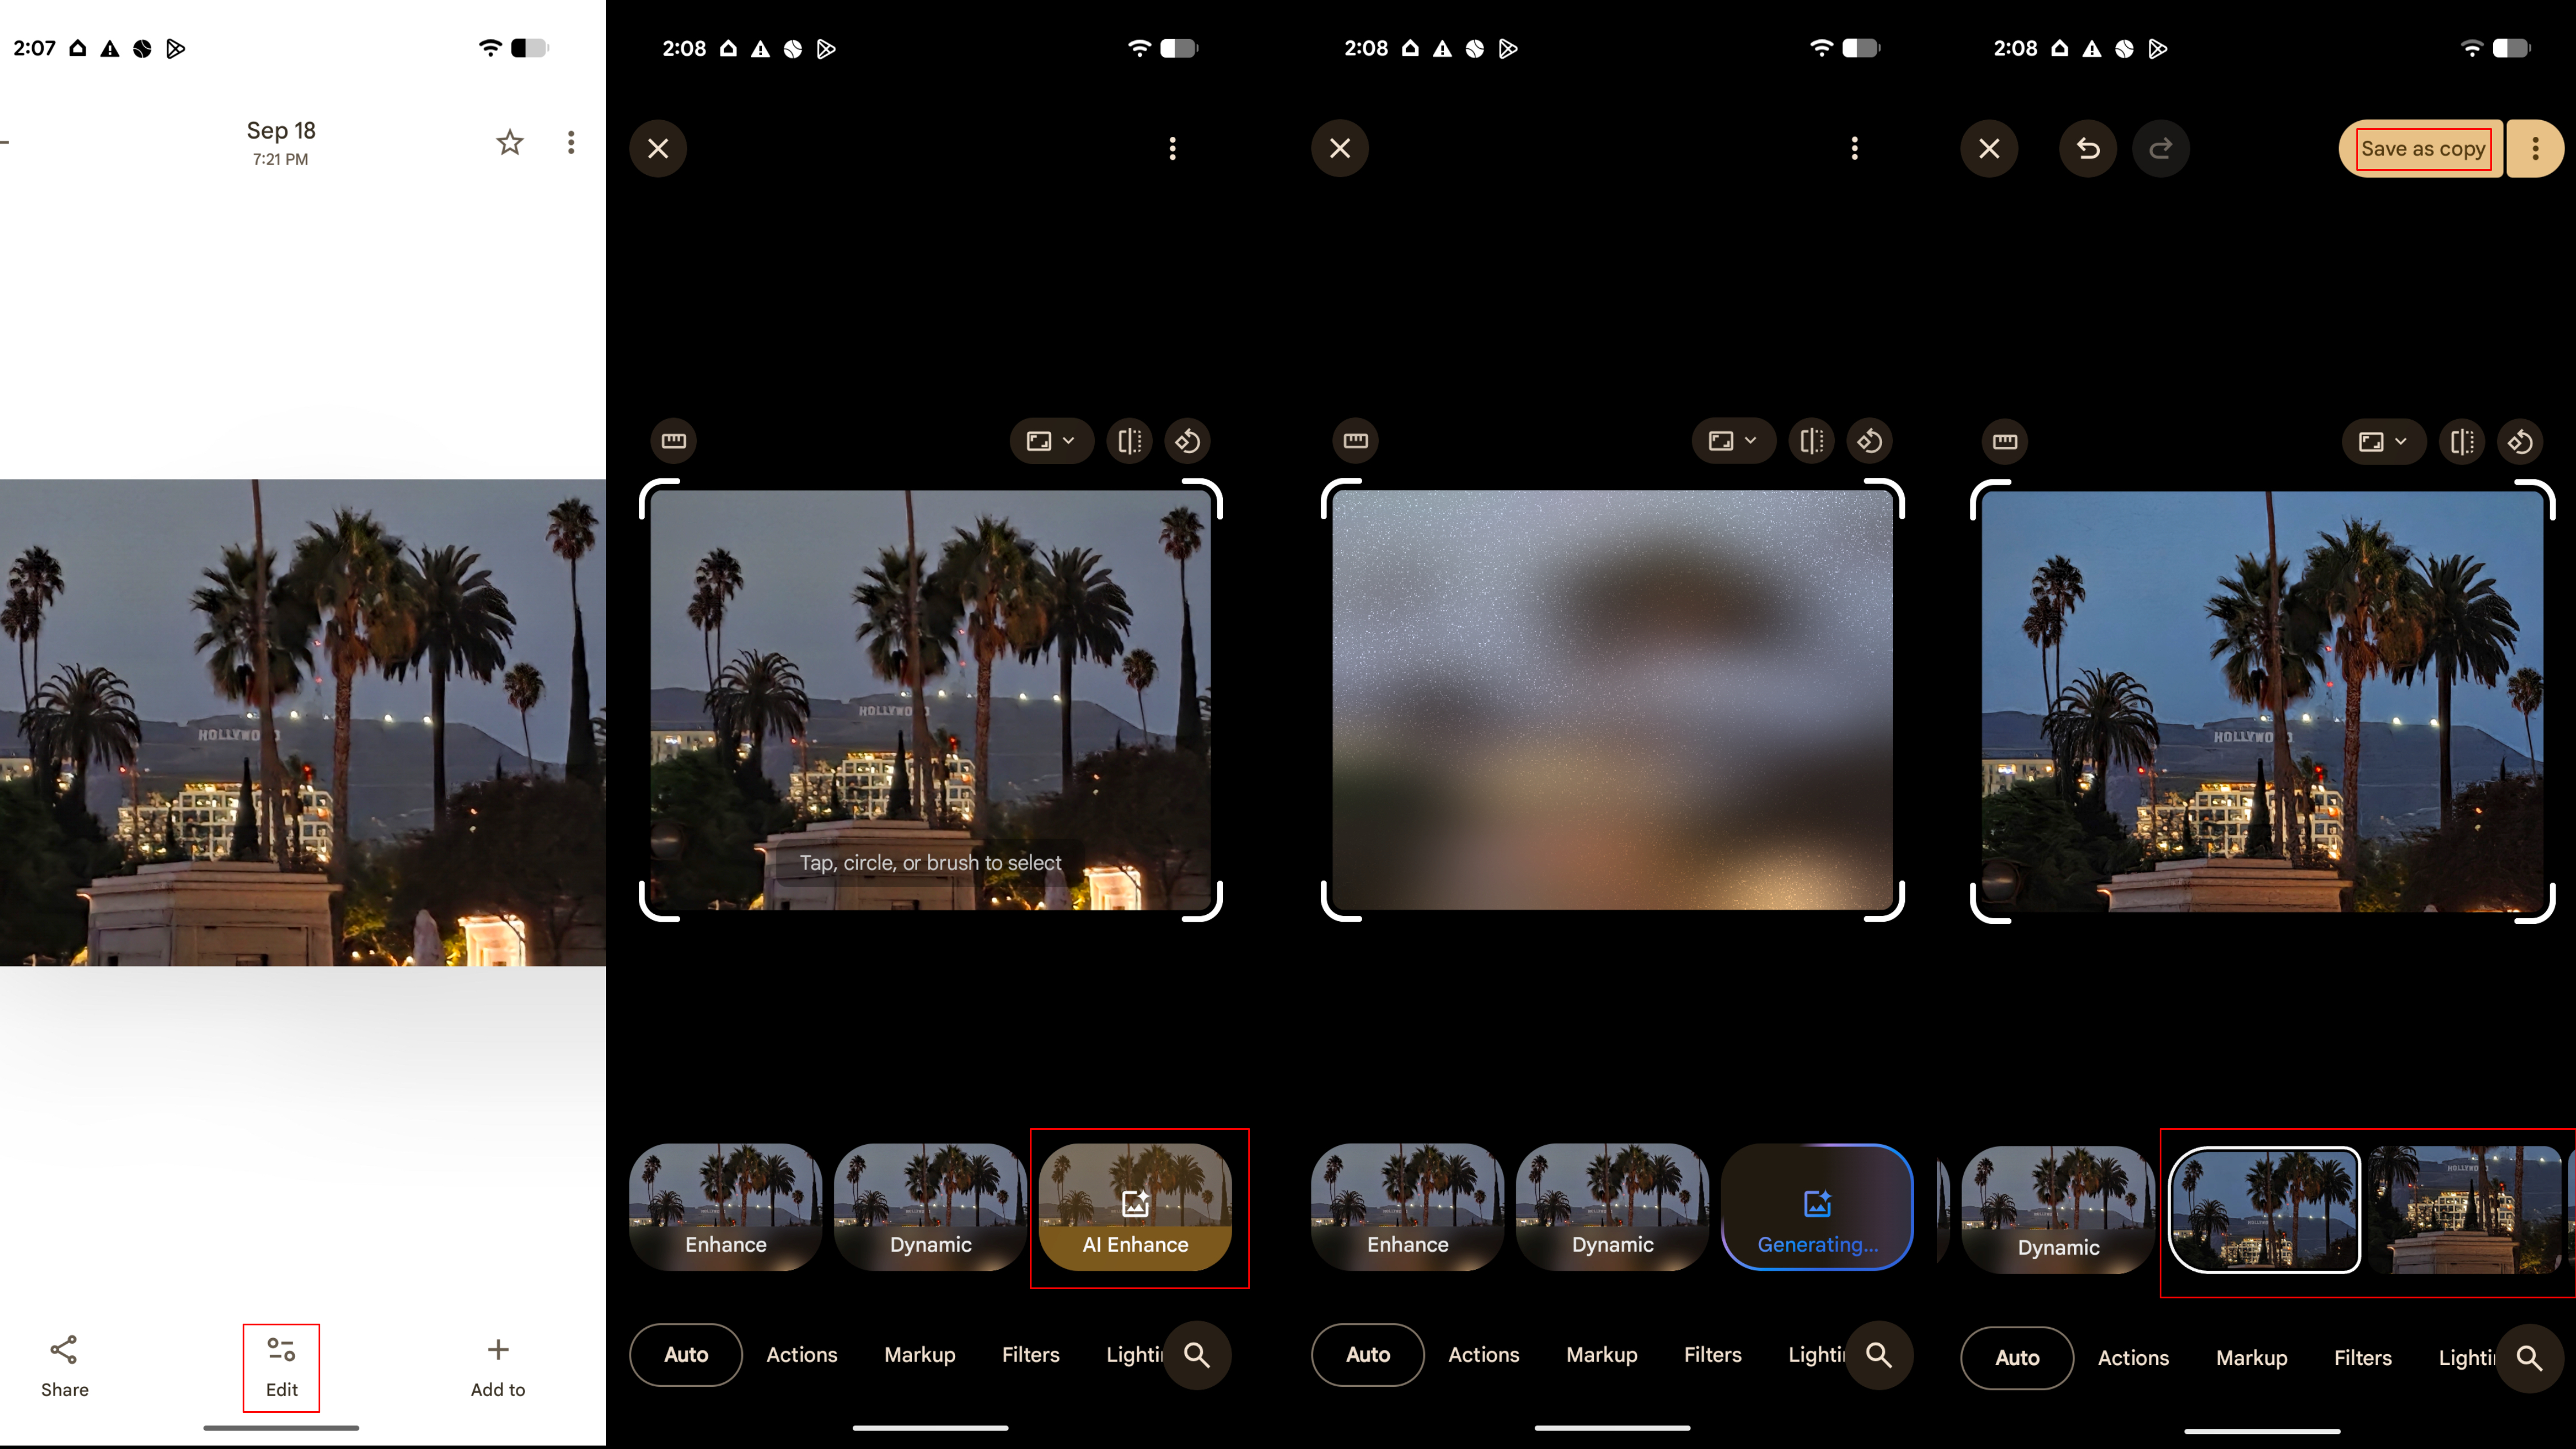
Instantly Improve Photos with AI Enhance
For a quick, one-tap improvement, AI Enhance is the perfect tool. It automatically adjusts lighting, color, and clarity to make your photo pop.
- Open your photo in the Edit view.
- Simply tap AI Enhance from the main toolbar.
- The tool will generate a few enhanced options for you to swipe through.
- Choose your favorite and tap Save as copy.
Pro Tips for the New Editor

The single best trick for navigating the new editor is to use the search bar. If you can't find a tool, just start typing its name, and the list will filter to show you exactly what you're looking for.
Remember, while the Magic Editor button is gone, its powerful features are more accessible than ever. They've just been split into the dedicated tools covered above. All your favorite AI editing capabilities are still here—they just have new homes.
While many of these features are now widely available, the ultimate Google Photos experience is often found on a Google Pixel phone, which sometimes gets exclusive features or faster updates.
Compare Plans & Pricing
Find the plan that matches your workload and unlock full access to ImaginePro.
| Plan | Price | Highlights |
|---|---|---|
| Standard | $8 / month |
|
| Premium | $20 / month |
|
Need custom terms? Talk to us to tailor credits, rate limits, or deployment options.
View All Pricing Details