Developer Offer
Try ImaginePro API with 50 Free Credits
Build and ship AI-powered visuals with Midjourney, Flux, and more — free credits refresh every month.
Create AI Images In Google Docs With Gemini
Google Docs has unveiled an exciting and practical new feature powered by Gemini: integrated AI image generation. This means you can now bring your ideas to life with custom visuals created directly within your documents, eliminating the need to juggle multiple applications or use standalone AI tools.
Powered by Google's advanced Gemini AI, this tool transforms your text descriptions into detailed images. While the concept is similar to other AI image generators, its direct integration into Google Docs offers a significant advantage for seamless content creation. Users can expect solid image quality, but the primary benefit is the enhanced workflow, allowing you to generate visuals without interrupting your writing process.

Ready to enhance your documents with AI-generated images? Here’s a step-by-step guide.
1. Access the Image Generator
First, open a new or existing Google Doc. Place your cursor where you intend to insert the AI-generated image.
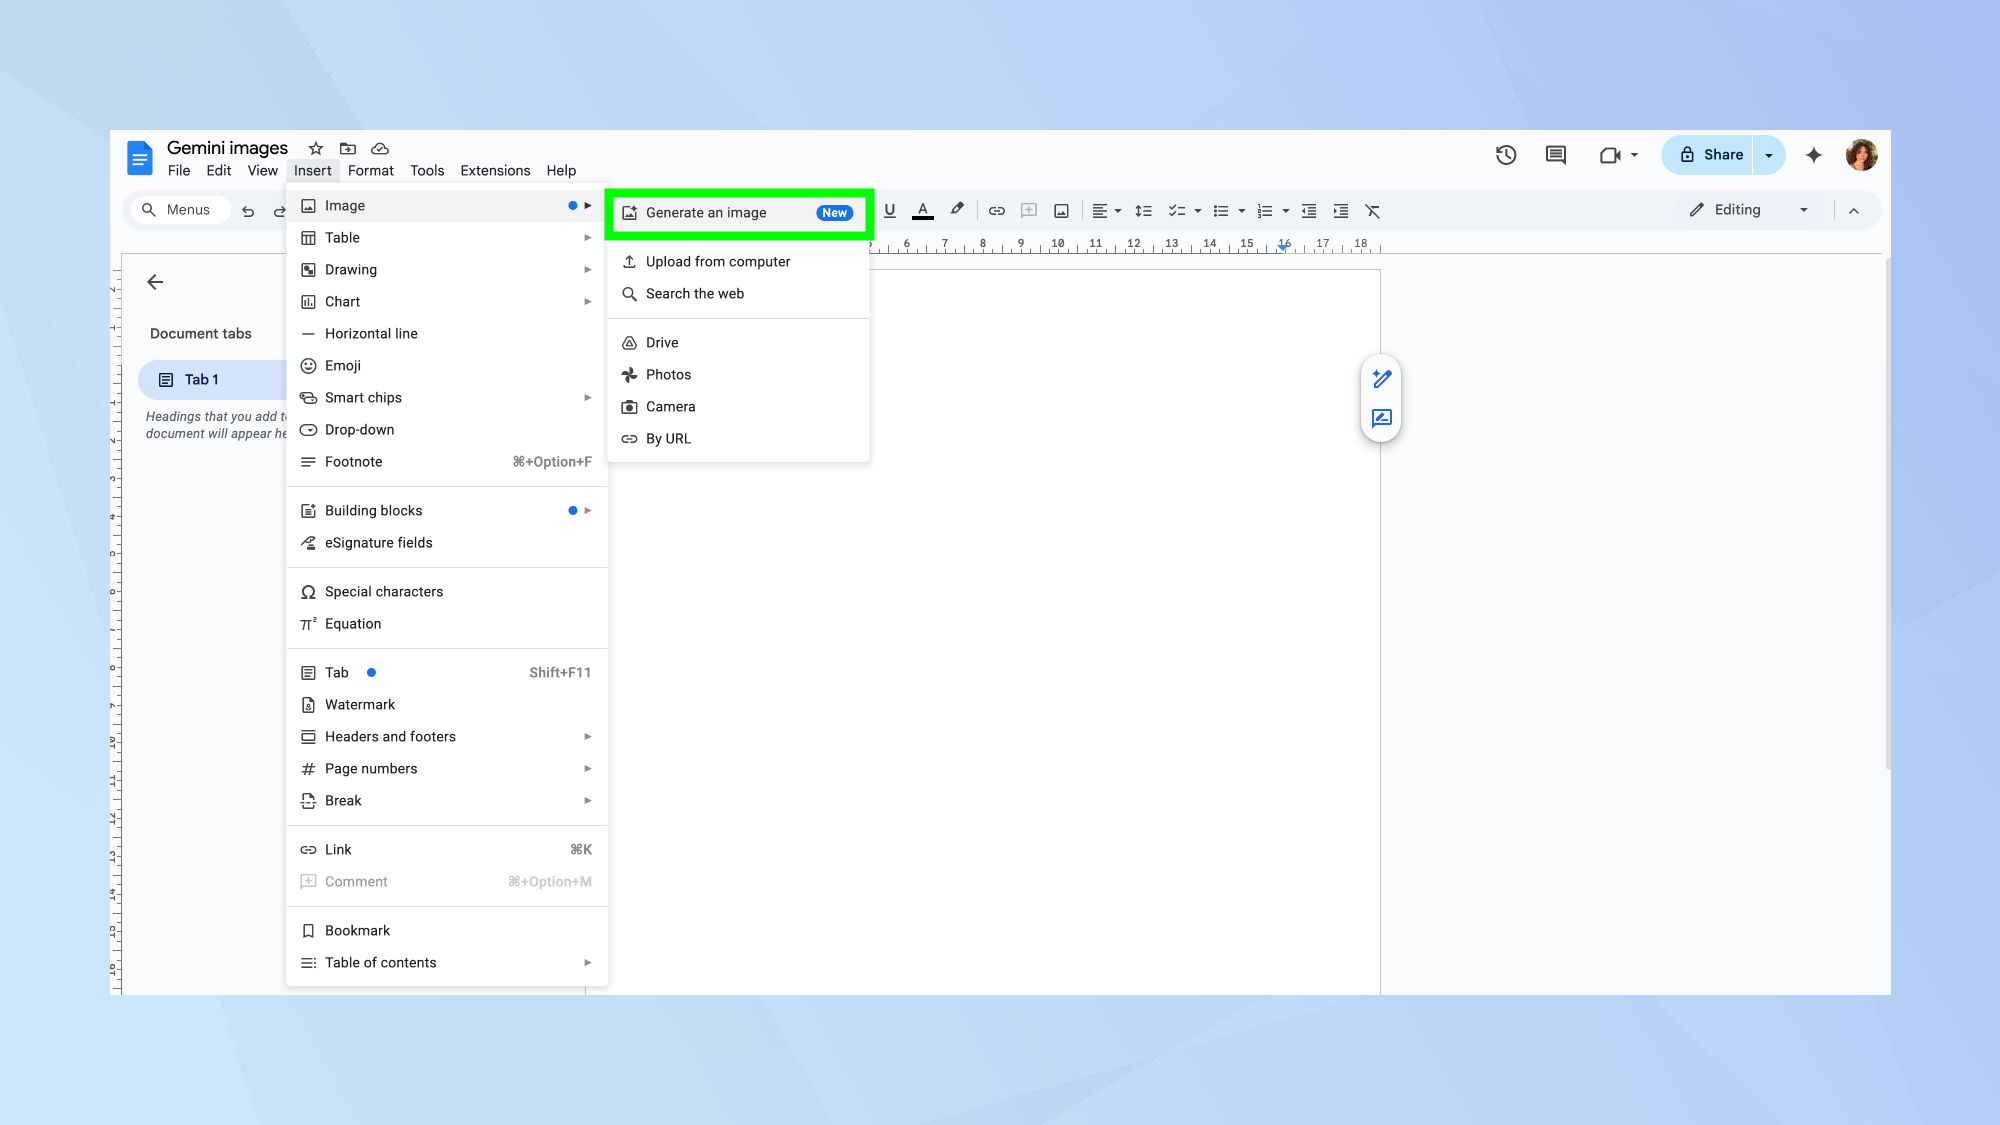
Navigate to the top menu, click on Insert, then hover over Image, and select Generate image from the options that appear. This action will open the Gemini image generation panel on the side of your document.
2. Craft Your Image Description
In the prompt box that appears, type a detailed description of the image you want to create. Be as specific as possible about the subject matter, colors, lighting, artistic style, and any other elements you envision.
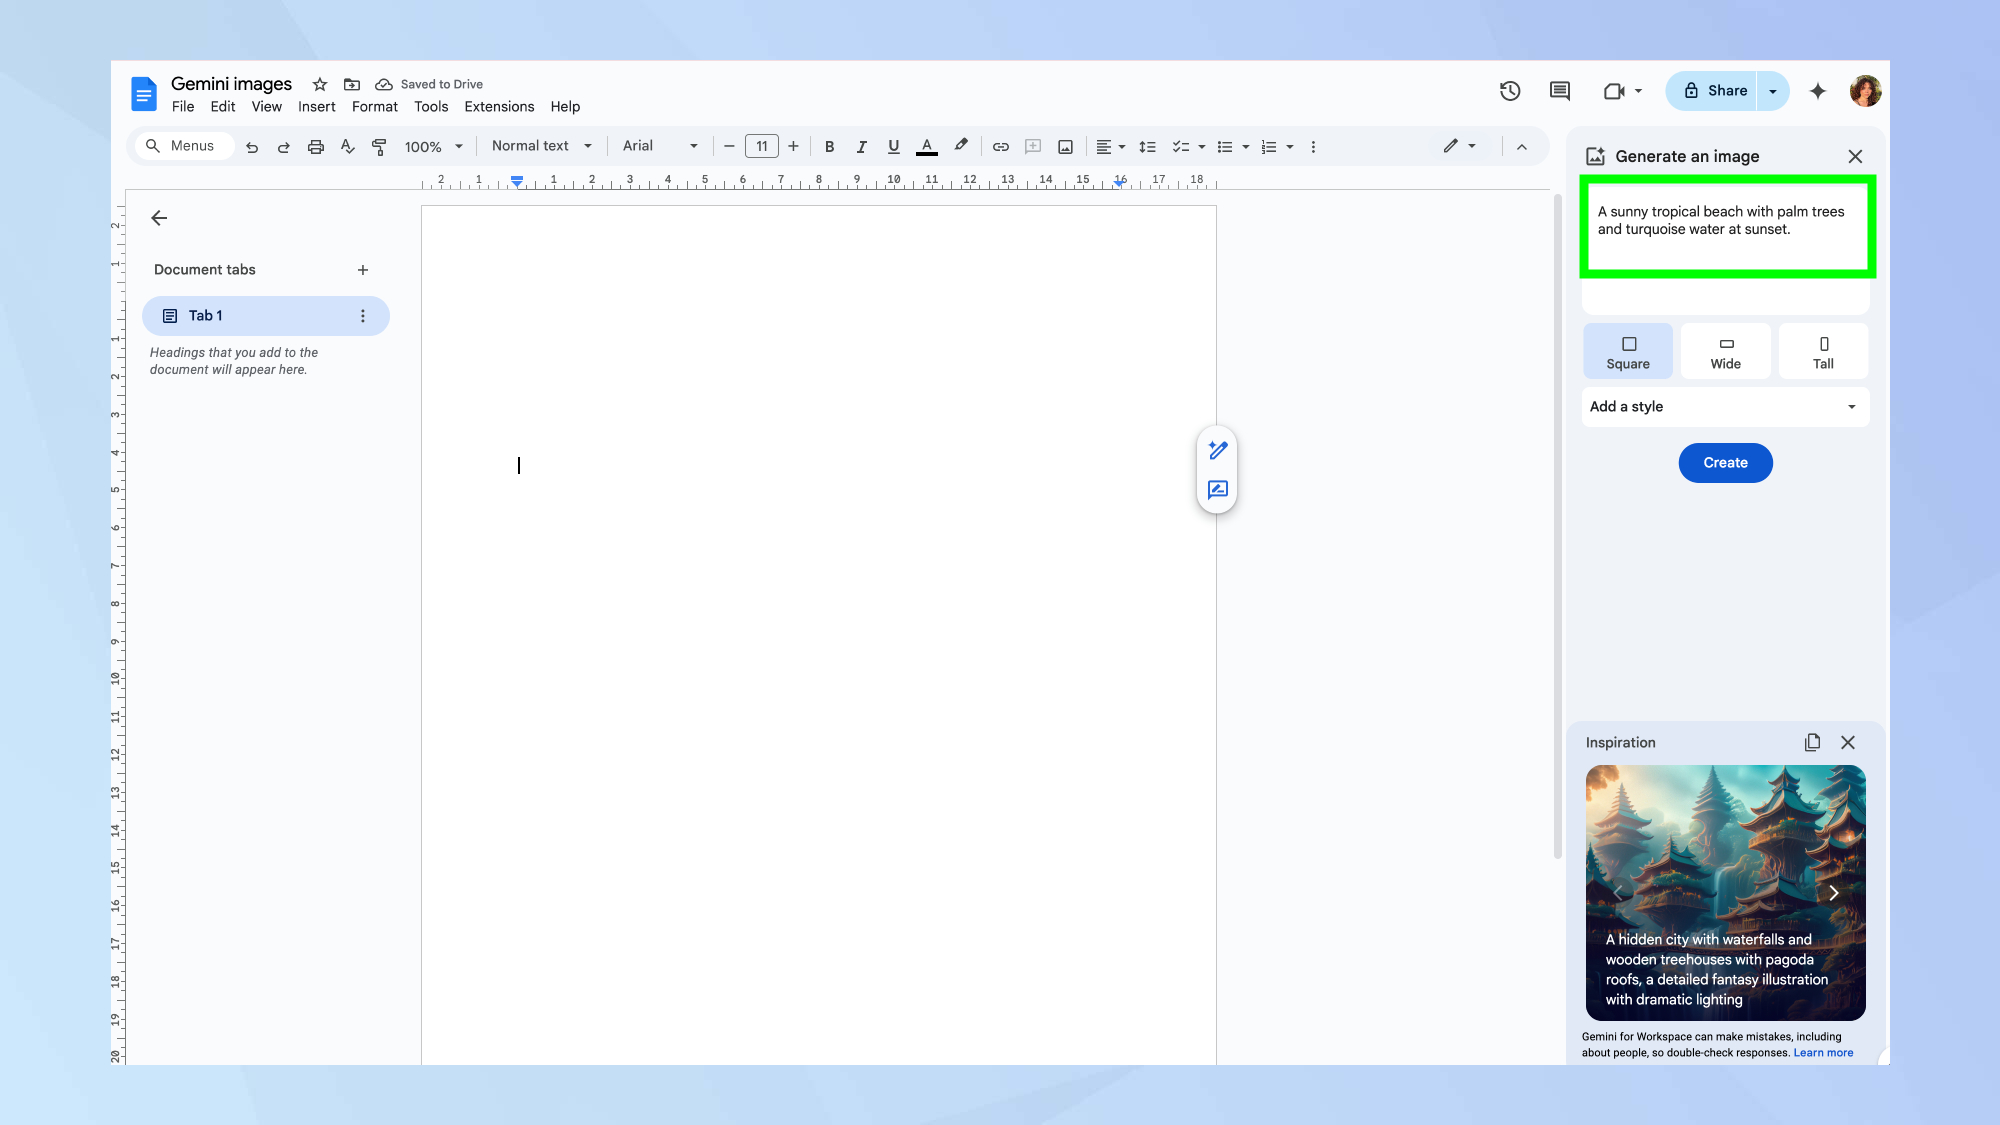
The clearer and more detailed your prompt, the better Gemini will be able to match your vision. For instance, instead of a simple "beach scene," try something more descriptive like "a sunny tropical beach with tall palm trees, turquoise water, and a vibrant sunset in the background."
3. Customize the Style and Format
This step is optional but can help refine your image. Before hitting create, you can adjust settings using the options below the prompt box.

Click the drop-down arrow next to Add a style to choose from various artistic styles, such as watercolor, photorealistic, sketch, or cartoon. You can also select the image format – square, wide (landscape), or tall (portrait) – depending on how you plan to use the image in your document.
4. Generate and Select Your Image
Once you're satisfied with your prompt and any style customizations, click the Create button. Gemini will then process your request and generate four different image variations based on your description.
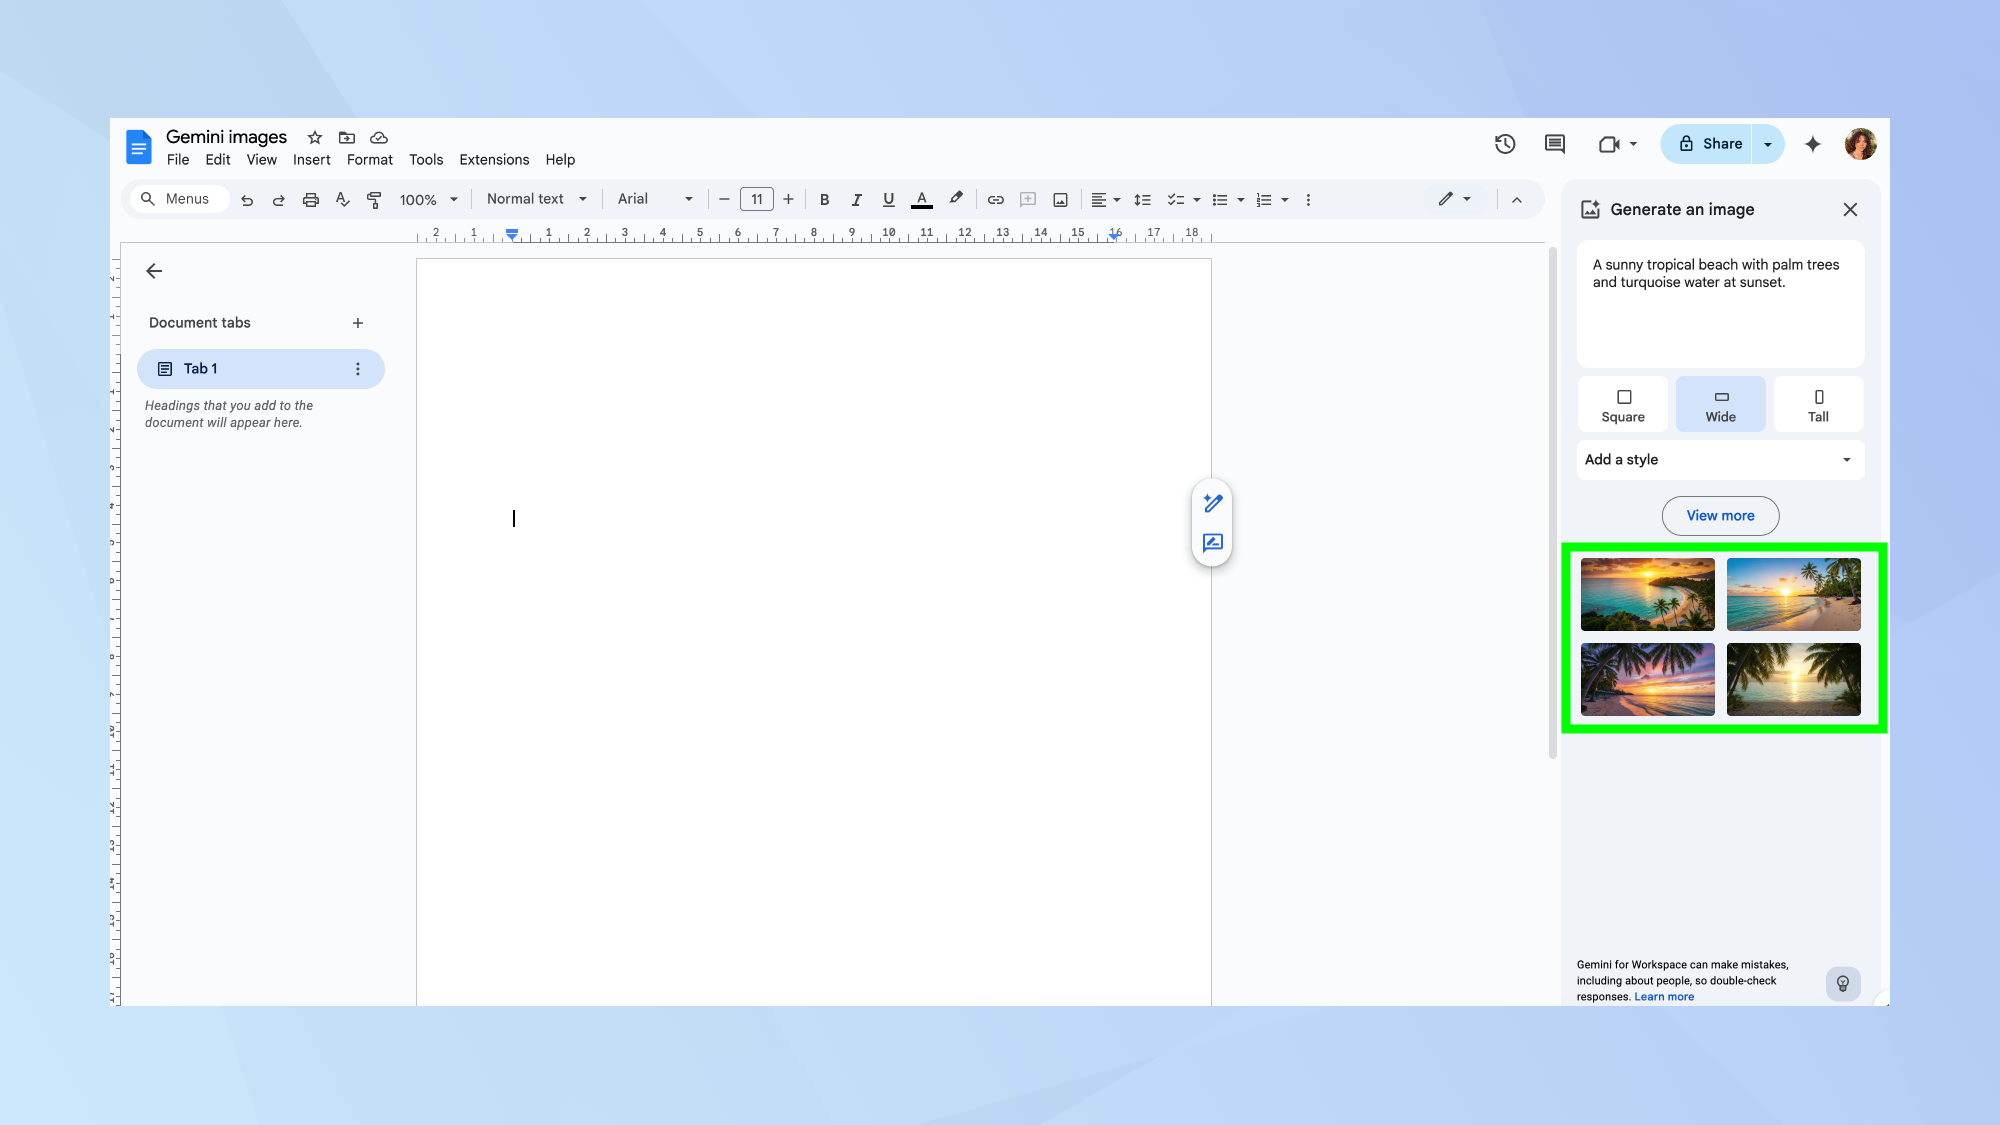
Take a moment to review all the generated options. If none of them perfectly match what you had in mind, you can click View more to prompt Gemini to generate additional variations. You can also refine your initial text prompt and try again.
5. Insert the Image into Your Document
When you find an image that you like from the generated options, simply click on it.
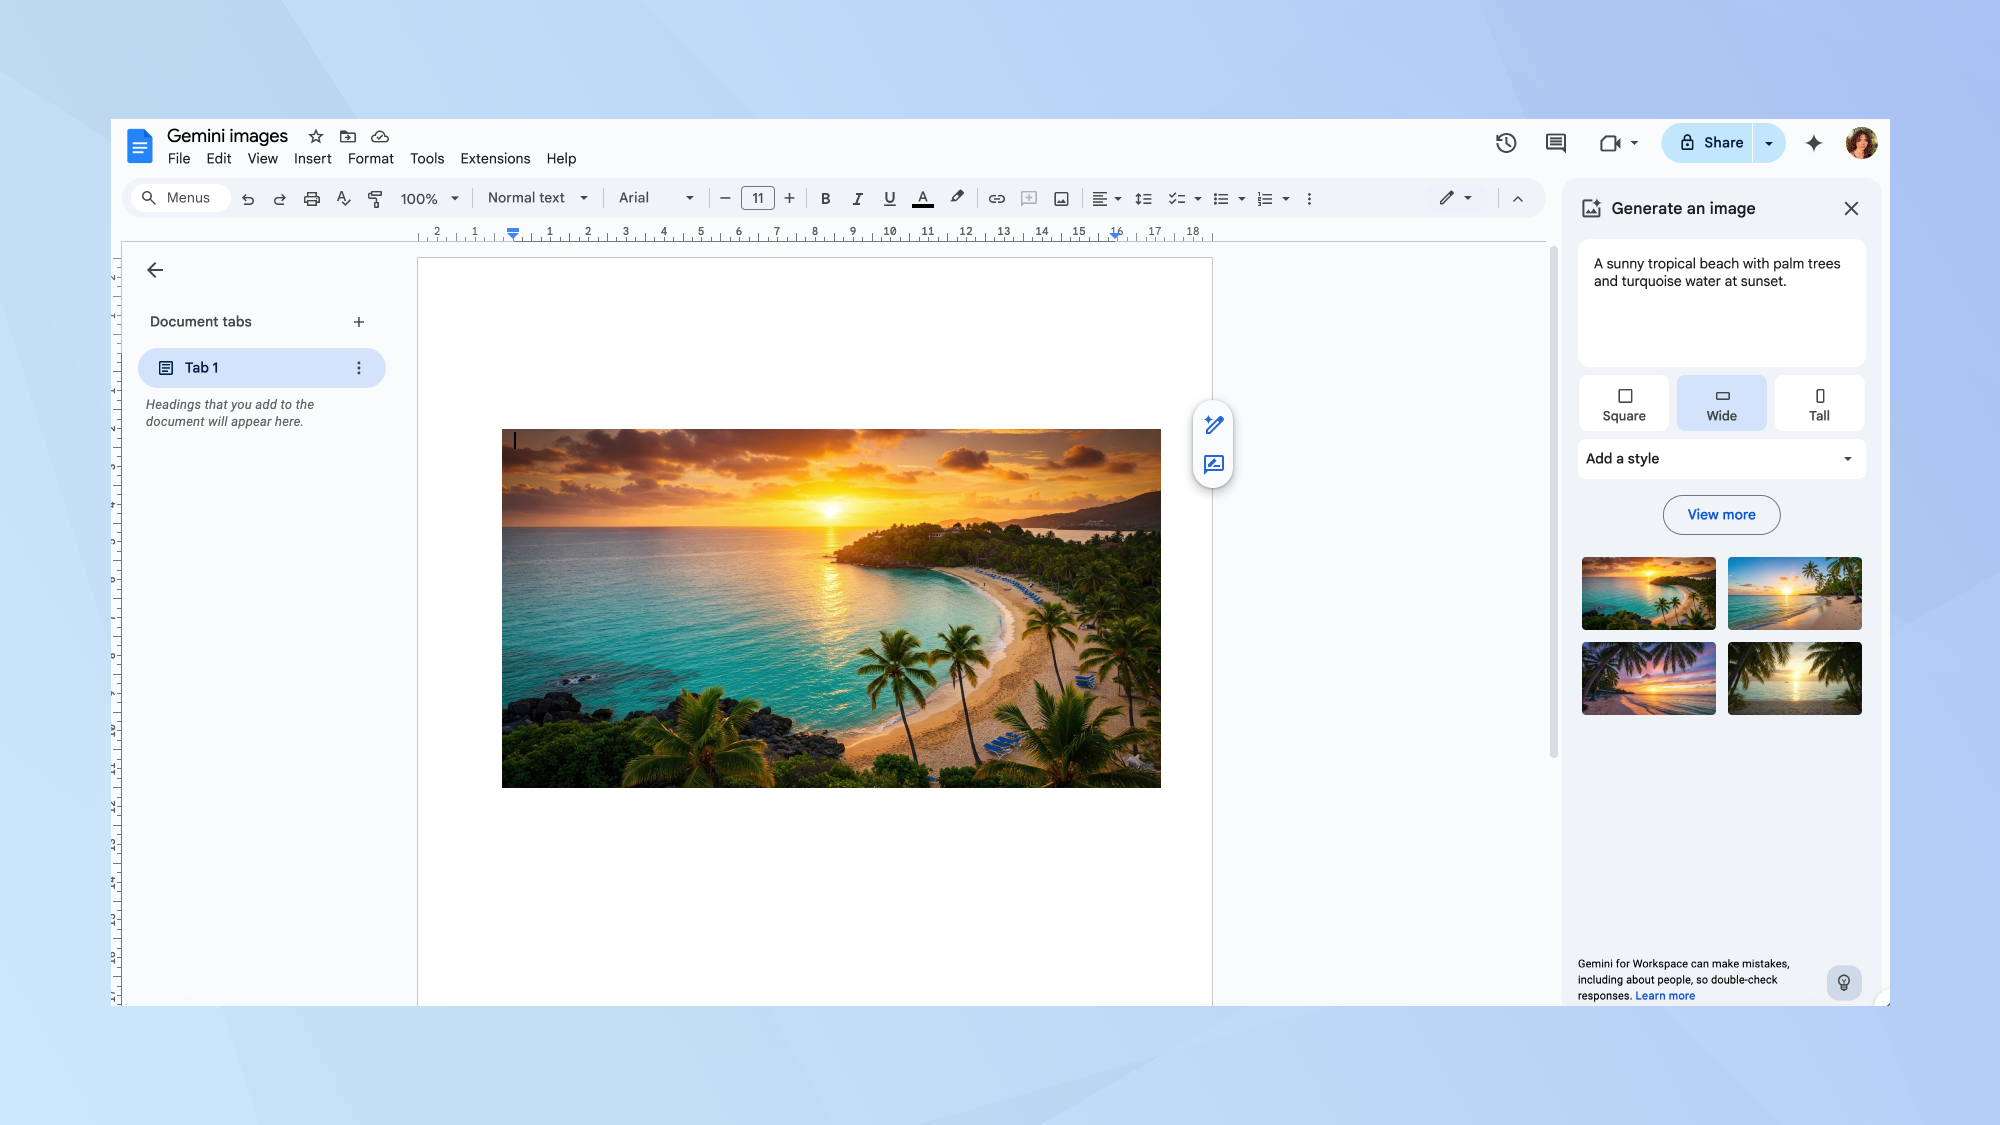
The selected image will be automatically inserted into your Google Doc at the current cursor position. From there, you can resize or reposition it just like any other image to best fit your document's layout and design.
If you're looking for more tech tips, you might also be interested in how to prevent your browser from draining your laptop battery.
Explore More
Here are some other interesting topics you might find useful:
Compare Plans & Pricing
Find the plan that matches your workload and unlock full access to ImaginePro.
| Plan | Price | Highlights |
|---|---|---|
| Standard | $8 / month |
|
| Premium | $20 / month |
|
Need custom terms? Talk to us to tailor credits, rate limits, or deployment options.
View All Pricing Details