Developer Offer
Try ImaginePro API with 50 Free Credits
Build and ship AI-powered visuals with Midjourney, Flux, and more — free credits refresh every month.
The Ultimate Guide to FLUX 3 - Updated Guide
The Ultimate Guide to FLUX 3 - Updated Guide

The FLUX 3 Guide: Advanced AI Image Generation for Developers and Creators
AI image generation has evolved from a curiosity into a core production tool, and FLUX 3 represents one of the most capable models in this space. This FLUX 3 guide is written for developers, designers, marketers, and hobbyists who want to move beyond random experimentation and build repeatable, high-quality image workflows. We will cover the latest updates, practical setup steps, prompting strategies, technical parameters, and a grounded comparison with alternatives like Imagine Pro. By the end, you will have a clear mental model for producing consistent, professional results.
Understanding FLUX 3: What the Updated Guide Covers
What Is FLUX 3 and Why It Matters
FLUX 3 is a text-to-image generation model developed by Black Forest Labs, the team behind the FLUX family of open models. It builds on the transformer-based diffusion architecture that made FLUX.1 popular, but with meaningful improvements in prompt faithfulness, visual coherence, and output resolution. In practice, that means fewer garbled text renderings, better handling of complex scenes, and more reliable results across different artistic styles. For anyone working with AI art tools, understanding FLUX 3 is important because it sets a high bar for what open-weights image models can achieve.
FLUX 3 Guide to the Latest Updates

The updated FLUX 3 guide centers on several significant upgrades. Generation speed is noticeably faster than previous checkpoints, especially when using quantized versions on consumer GPUs. Resolution ceilings have been raised, which helps when producing print-ready assets. Prompt adherence is also stronger, so the model pays more attention to descriptive details instead of defaulting to generic interpretations. New creative controls, including finer-grained style modifiers and improved negative prompting, give users more leverage over the final output. Together, these changes make the model more practical for real production work.
Who Should Use FLUX 3?
FLUX 3 appeals to a broad audience. Developers building AI workflows will appreciate the API and local inference options. Designers can use it for concept exploration, mood boards, and client pitches. Marketers and content creators benefit from fast generation of social media visuals and ad variants. Even hobbyists exploring AI art will find the model approachable, provided they are comfortable with a bit of technical setup. If you fall into any of these groups, the rest of this article is designed for you.
Getting Started with AI Image Generation with FLUX 3
Setting Up Your FLUX 3 Workspace

You have two main paths: local or API. Locally, FLUX 3 typically runs through Python-based inference pipelines such as Diffusers, and you will want a GPU with at least 8 GB of VRAM for reasonable speeds. Quantized versions reduce memory requirements significantly, making the model accessible on smaller consumer cards. On the API side, platforms like Replicate and Together host FLUX models, so you can generate images without owning a GPU. If you prefer zero setup, consider exploring Imagine Pro's free trial for fast, high-resolution generation right in the browser.
AI Image Generation with FLUX 3: Step-by-Step Workflow
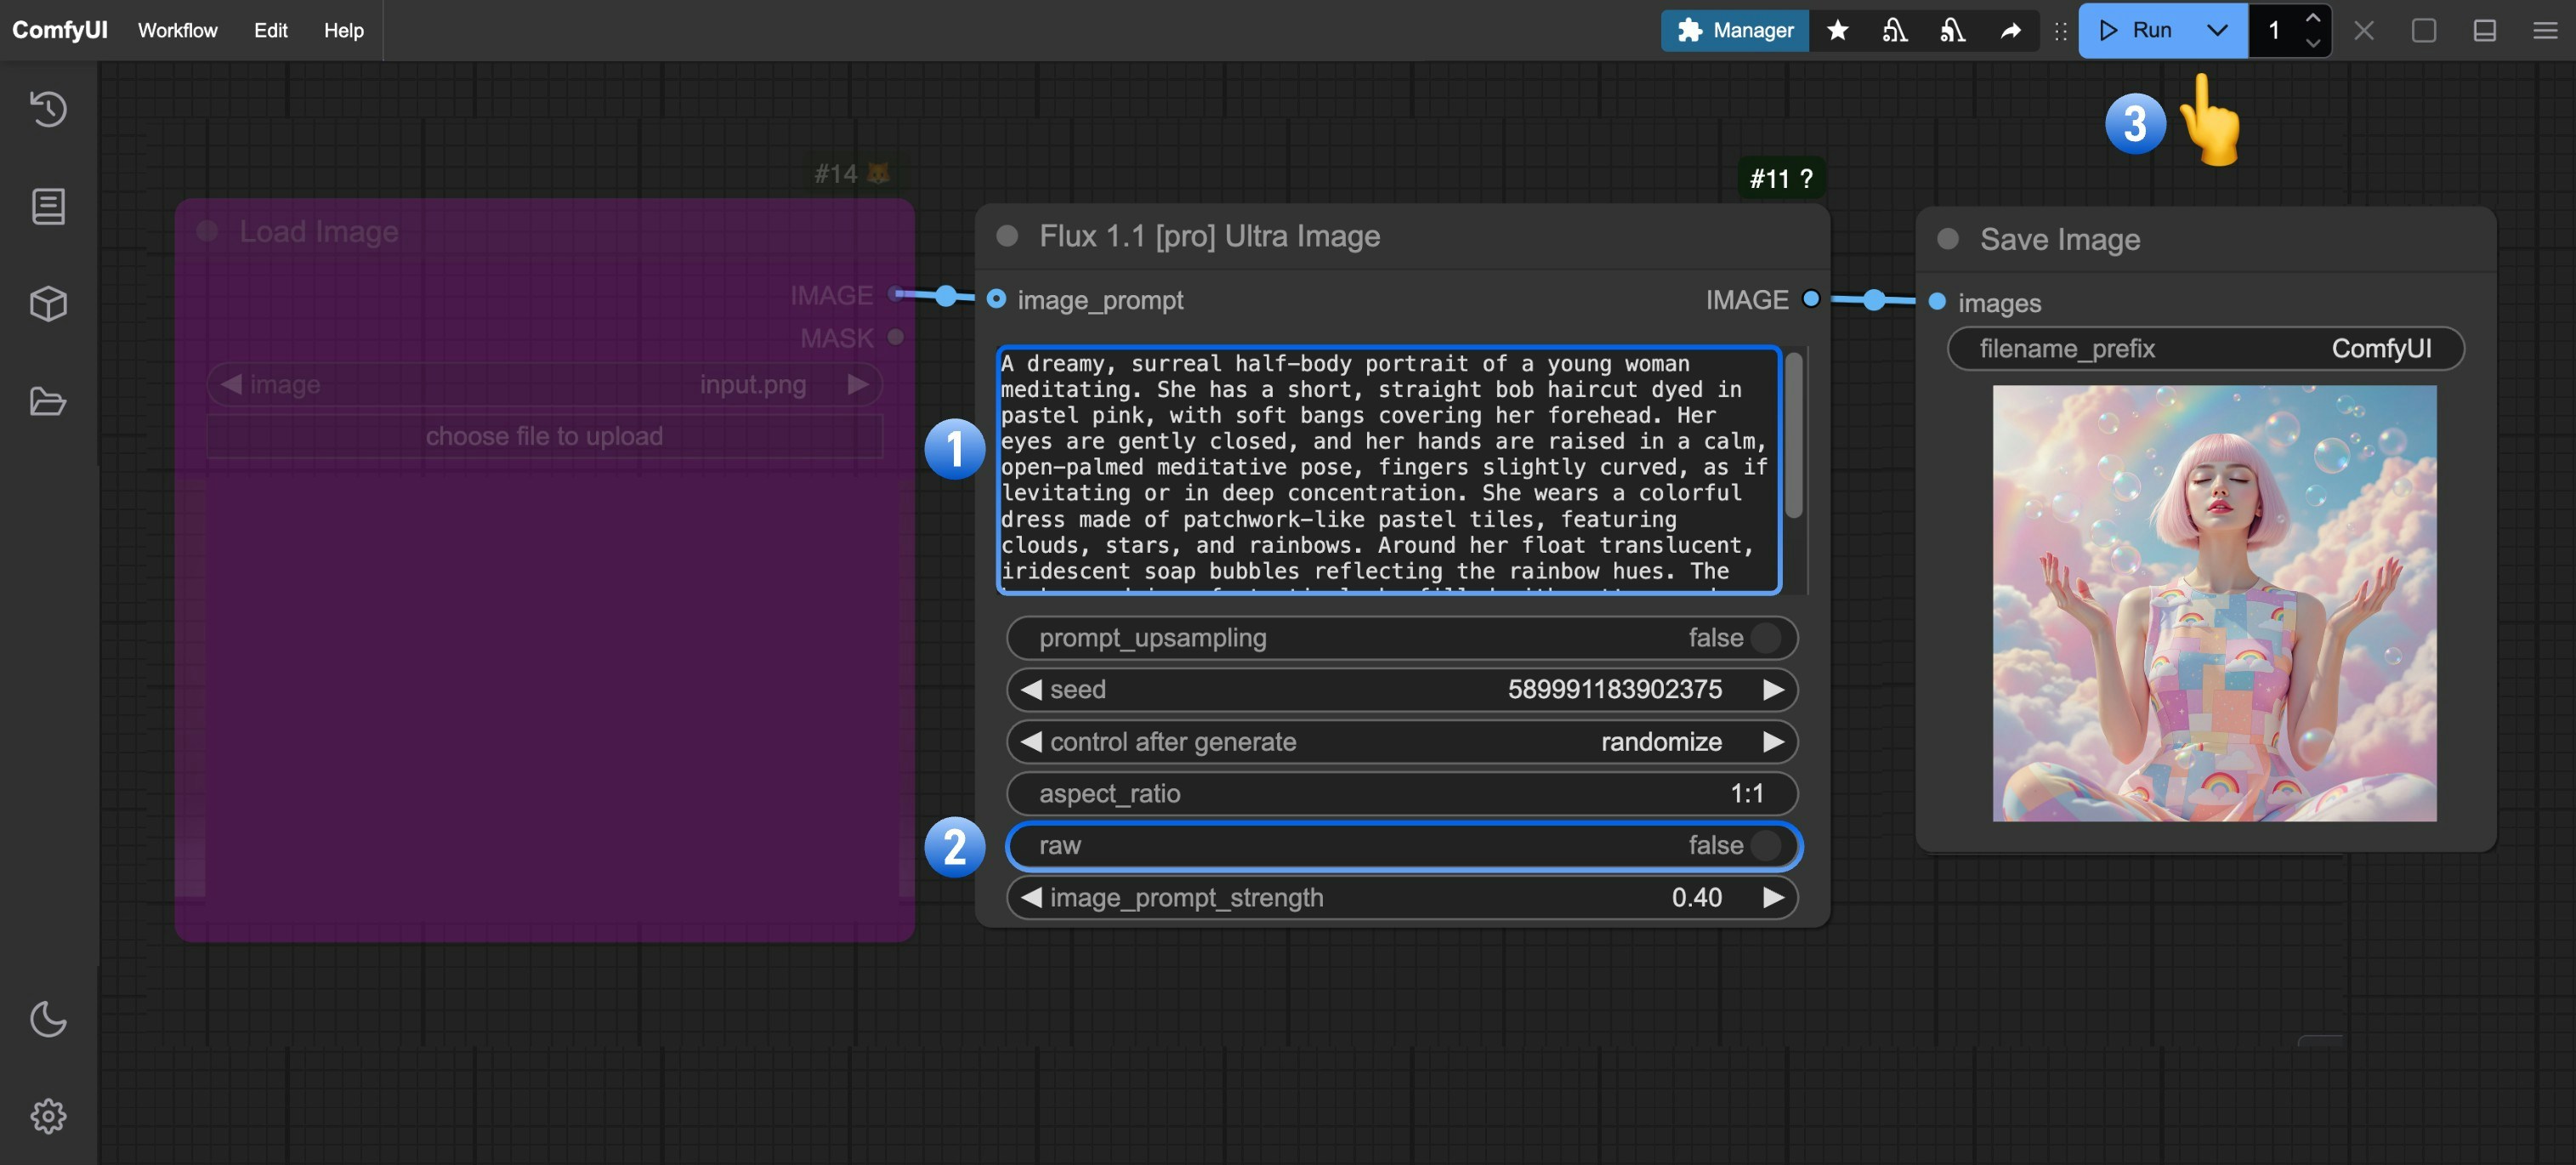
A reliable workflow keeps output quality consistent. Start by writing a clear prompt that states the subject, setting, style, and lighting. Choose your aspect ratio based on the destination platform. Set parameters like steps and CFG scale, then generate a batch of four to eight images. Review the results, pick the strongest ones, and iterate by adjusting the prompt rather than regenerating from scratch. In practice, the key is to change one variable at a time so you understand exactly what influences the output.
Choosing Output Settings and Formats
FLUX 3 supports multiple resolutions and aspect ratios. The exact options depend on the hosting platform, but a few guidelines apply. For web and social content, a 1:1 ratio at 1024×1024 is a safe starting point. For print, use the highest resolution supported and plan to upscale if needed. Batch count matters too: generating multiple images at once is often cheaper than running separate calls and gives you more material for selection. Output formats are typically PNG or JPEG; PNG is preferable when you need transparency or lossless quality.
Essential FLUX 3 Tips for High-Quality Images
Prompt Engineering Fundamentals
The prompt is the single largest lever you control. A strong prompt includes a concrete subject, a setting, a style reference, lighting direction, and detail keywords. For example, instead of "a castle," write "a snow-covered medieval castle on a clifftop at golden hour, cinematic lighting, ultra-detailed, wide-angle shot." The extra specificity gives the model unambiguous constraints. In my experience, ordering details by importance also helps: subject first, then context, then style.
Advanced FLUX 3 Tips: Negative Prompts and Style Modifiers
Negative prompts let you exclude unwanted elements. If your output tends to contain text artifacts or extra fingers, list them explicitly in the negative prompt field. Style modifiers are equally powerful. Phrases like "octane render," "35mm film grain," or "flat vector illustration" steer the model toward distinct aesthetics. You can also reference artistic movements or historical eras for more abstract control. The trick is to test one modifier at a time and build a vocabulary of phrases that reliably produce the looks you need.
Common FLUX 3 Mistakes and How to Fix Them
A common mistake is overcomplicating the prompt with too many conflicting ideas. The model tries to reconcile everything, and the result becomes muddled. Another frequent error is choosing the wrong aspect ratio after generating; cropping a square image to a banner ratio destroys composition quality. Ignoring the seed is a third mistake, especially when you find a great image and want to explore variations. Always record the seed so you can reproduce or refine successful outputs.
Advanced FLUX 3 Guide to Prompting and Parameter Control
Anatomy of a Powerful Prompt
Consider this prompt: "A sleek electric sports car racing through neon-lit city streets at night, rain-slicked asphalt, cyberpunk style, motion blur, low-angle shot, cinematic, high detail." Each component serves a purpose. The subject ("electric sports car") anchors the content. The setting ("neon-lit city streets, rain-slicked asphalt") establishes context. Style ("cyberpunk") steers the aesthetic. Camera terms ("low-angle shot, motion blur") control composition. Detail keywords ("cinematic, high detail") raise quality expectations. Deconstruct your best prompts, and you will find the same pattern.
FLUX 3 Parameters Decoded: CFG, Steps, and Seed
The three essential parameters are CFG scale, sampling steps, and seed. CFG scale, short for classifier-free guidance, controls how strongly the model follows your prompt; a typical range is 2–7, with higher values increasing adherence but risking oversaturation or artifacts. Steps control the number of denoising iterations; 20–30 steps is usually enough, and more steps do not always mean better images. The seed determines the initial noise pattern. Here is a hidden insight: consistent seeds are key for reproducible brand imagery. If you need a series of images with a similar composition, keep the seed fixed and vary only the descriptive words.
Using Image-to-Image and Inpainting Workflows
Image-to-image starts from an existing picture and applies your prompt as a transformation. This is useful for restyling a product photo or turning a sketch into a polished render. Inpainting goes further by regenerating only a masked region. In practice, professional creators use inpainting to fix a hand, remove a background object, or swap a logo without regenerating the entire image. Most FLUX hosting platforms expose these features through a simple mask interface or the API.
Under the Hood: How FLUX 3 Works
Technical Deep Dive: Architecture and Inference
FLUX 3 builds on the hybrid architecture established by FLUX.1: a transformer-based diffusion backbone combined with a separate text encoder, typically a version of T5 or a comparable multimodal encoder. During inference, the model starts from pure noise and iteratively denoises it into an image, guided by the prompt embedding. Flow matching replaces traditional noise scheduling in this model family, which improves stability and reduces the number of steps required for high-quality output. Understanding this pipeline matters because it explains why certain prompts produce certain behaviors, such as why heavily detailed prompts can dilute attention across too many elements.
Why Updated Versions Change Output Quality
Each checkpoint represents a retraining or fine-tuning pass, and updated versions change output quality for three main reasons: new training data, architectural refinements, and adjusted conditioning logic. A model trained on more diverse, higher-resolution images will render faces and textures better. Refinements to the text encoder improve prompt faithfulness. For users, the practical implication is simple: always retest your prompt library when a new checkpoint drops, because the same prompt can produce noticeably different results.
Performance Benchmarks and Speed Optimizations
Measuring FLUX 3 performance requires attention to generation time, GPU memory usage, and cost per image. For local inference, track seconds per image and peak VRAM consumption. For API usage, measure latency and price per generation. A useful optimization is using torch.compile or TensorRT acceleration, which can cut inference time substantially. Quantized variants reduce memory usage at a modest quality cost. Teams integrating FLUX 3 into production should benchmark their exact workload rather than relying on vendor numbers, since results vary by hardware and batch configuration.
Real-World AI Image Generation with FLUX 3: Use Cases and Lessons
Marketing and Social Media Creative
Brands use FLUX 3 to generate ad creatives, social posts, and campaign concepts at scale. The ability to quickly produce variant backgrounds, layouts, and visual themes lets marketing teams test more ideas before committing to a direction. The lesson here is speed: a single afternoon can yield dozens of candidate concepts that would have taken days with traditional photoshoots. When producing for social platforms, remember to match the aspect ratio to the destination, whether that is a 9:16 story, a 1:1 feed post, or a 16:9 banner.
Concept Art and Product Visualization
Designers rely on FLUX 3 for early-stage concept exploration. A mood board that previously required gathering reference images from across the web can now be generated from a short list of prompts. Product visualization follows a similar logic: describe a packaging concept or a product in a particular environment, and the model produces a credible visual placeholder. These outputs are not always final assets, but they communicate ideas effectively before expensive production begins.
Lessons from Production Workflows
Real production workflows reveal the importance of organization. Teams that maintain prompt libraries, versioned seed logs, and structured output folders consistently produce better results than those who generate ad hoc. A practical system includes a naming convention for prompts, a spreadsheet tracking successful seeds, and a review queue where a human curates the best outputs. Quality consistency comes from treating the model as a collaborative tool rather than a black box.
FLUX 3 vs Imagine Pro: A Comparative Guide
Feature-by-Feature Comparison
For readers weighing their options, the FLUX 3 vs Imagine Pro question comes down to control versus convenience. The table below summarizes the main differences.
| Feature | FLUX 3 | Imagine Pro |
|---|---|---|
| Speed | Variable, depends on hardware or API | Optimized for fast turnaround |
| Resolution | High-resolution, configurable | High-resolution with upscaling |
| Ease of use | Requires setup and technical knowledge | Zero-setup web interface |
| Pricing | Open-source weights / API credits | Free trial, then subscription |
| Customization | Full parameter control | Curated presets and styles |
| Best suited for | Developers and technical creators | Marketers and quick creative work |
Pros and Cons: FLUX 3 and Imagine Pro
FLUX 3 gives you maximum control, which is its main strength. You can tune every parameter, run it locally, and integrate it into custom pipelines. The trade-off is complexity: setup, hardware requirements, and prompt tuning all take time. Imagine Pro's AI image generator, by contrast, prioritizes speed and simplicity. You can produce polished visuals without worrying about infrastructure. The trade-off is less fine-grained control. Both are legitimate choices depending on whether you value flexibility or convenience.
When to Use FLUX 3 and When to Use Imagine Pro
A simple decision framework: choose FLUX 3 when you need deep technical control, local inference, or integration into a codebase. Choose Imagine Pro when you need a high-quality image quickly and do not want to manage infrastructure. Creative flexibility is strong in both, but the difference in ease of use is decisive for many non-technical users. For teams, a hybrid approach often works best: use FLUX 3 for technical experiments and AI image generation tools like Imagine Pro for fast-turnaround client work.
Industry Best Practices for FLUX 3
What the Experts Say About Prompting
Experts consistently recommend writing prompts as concise, structured descriptions rather than natural-language paragraphs. Common guidance includes using specific nouns, avoiding ambiguous adjectives, and placing the most important subject early. Many practitioners also advocate maintaining a prompt journal to document what works and what does not. The broader consensus is that prompting is a skill developed through disciplined experimentation, not luck.
Building Repeatable Workflows and Style Consistency
For brand-focused work, style consistency is essential. Create reusable templates that fix the style modifier, lighting description, and camera settings, while changing only the subject. Store these templates in a prompt library with version control. Log seeds and parameter settings for every successful output. If your team uses FLUX 3 via an API, codify these templates in configuration files so that every member generates from the same baseline.
Troubleshooting Common FLUX 3 Errors
When output looks distorted, reduce the CFG scale and simplify the prompt. If the prompt appears ignored, verify that your negative prompt does not contradict it, and increase the CFG value slightly. Generation timeouts typically occur when the image size or batch count exceeds available memory; lower the resolution or reduce the batch size. When text appears garbled in images, add "no text" to the negative prompt, or spell out the desired text precisely in the prompt so the model treats it as a rendering instruction.
The Future of FLUX 3 and AI Image Generation
Community Trends and Model Roadmap
The FLUX ecosystem evolves quickly. Community experiments focus on fine-tuning checkpoints for specific styles, blending multiple models, and building LoRA adapters. On the roadmap, expect continued improvements in resolution, faster inference, and better integration with video generation. Staying ahead means participating in community forums, tracking official model releases, and observing what techniques gain traction among power users.
How to Keep Your FLUX 3 Guide Skills Updated
The knowledge in this FLUX 3 guide will age, so plan to refresh it. Monitor official changelogs, join community forums, and test each new checkpoint against your existing prompt library. Subscribe to developer newsletters and watch benchmark comparisons from trusted sources. The field moves fast enough that a monthly review of your workflows is a reasonable investment.
Next Steps for Readers
The best way to learn is to build. Start a prompt library, pick one advanced setting per session, and document the results. If you want a low-friction introduction before diving into the technical side, try a free trial of Imagine Pro to see what professional-level AI image generation feels like without any setup. Then, once you understand the creative possibilities, return to FLUX 3 and apply the depth of control described throughout this guide.
Compare Plans & Pricing
Find the plan that matches your workload and unlock full access to ImaginePro.
| Plan | Price | Highlights |
|---|---|---|
| Standard | $8 / month |
|
| Premium | $20 / month |
|
Need custom terms? Talk to us to tailor credits, rate limits, or deployment options.
View All Pricing Details