Developer Offer
Try ImaginePro API with 50 Free Credits
Build and ship AI-powered visuals with Midjourney, Flux, and more — free credits refresh every month.
The Ultimate Guide to FLUX 3 - Updated Guide
The Ultimate Guide to FLUX 3 - Updated Guide

FLUX 3 AI Image Generator: The Complete Guide to Next-Gen AI Art
If you’ve been following AI image generation for more than a few months, you already know how fast the landscape moves. Every quarter brings a new model that claims to be more realistic, more stylable, and easier to control. The FLUX 3 AI image generator is one of those rare releases that actually backs up the hype. After spending time with it in real projects, I can say this is not just another incremental upgrade—it changes how you work with text-to-image tools. In this complete FLUX 3 guide, I’ll cover everything from your first prompt to advanced prompt engineering, compare it with Midjourney, and give you practical best practices for getting production-ready results.
Whether you’re a designer exploring concept art, a marketer creating campaign visuals, or a developer embedding AI art into your product, this deep dive will help you understand where FLUX 3 fits—and where it may not be the best choice.
Understanding FLUX 3 AI Image Generator
What Is FLUX 3 and Who Is It For?
FLUX 3 is a next-generation AI image generator built on a diffusion-based architecture that converts text prompts into high-resolution images. It’s aimed at creative professionals and hobbyists who need more than just pretty pictures. Unlike earlier text-to-image models that often required extensive fine-tuning or cryptic prompt syntax, FLUX 3 emphasizes natural language understanding and fine-grained control.
Who benefits most?
- Designers who need fast concept exploration and clean, editable styles.
- Content creators who want original visuals for social media or video thumbnails.
- Marketers who need on-brand images without hiring a photo studio.
- Artists who want a new medium for mixing surreal or fantasy concepts.
At the same time, FLUX 3 isn’t a magic button. You still need to understand prompt writing, resolution settings, and iterative refinement. This FLUX 3 tutorial is designed to get you productive in your first session.
Key Capabilities of FLUX 3: Resolution, Speed, and Style Control
Here are the headline features I’ve tested in practice:
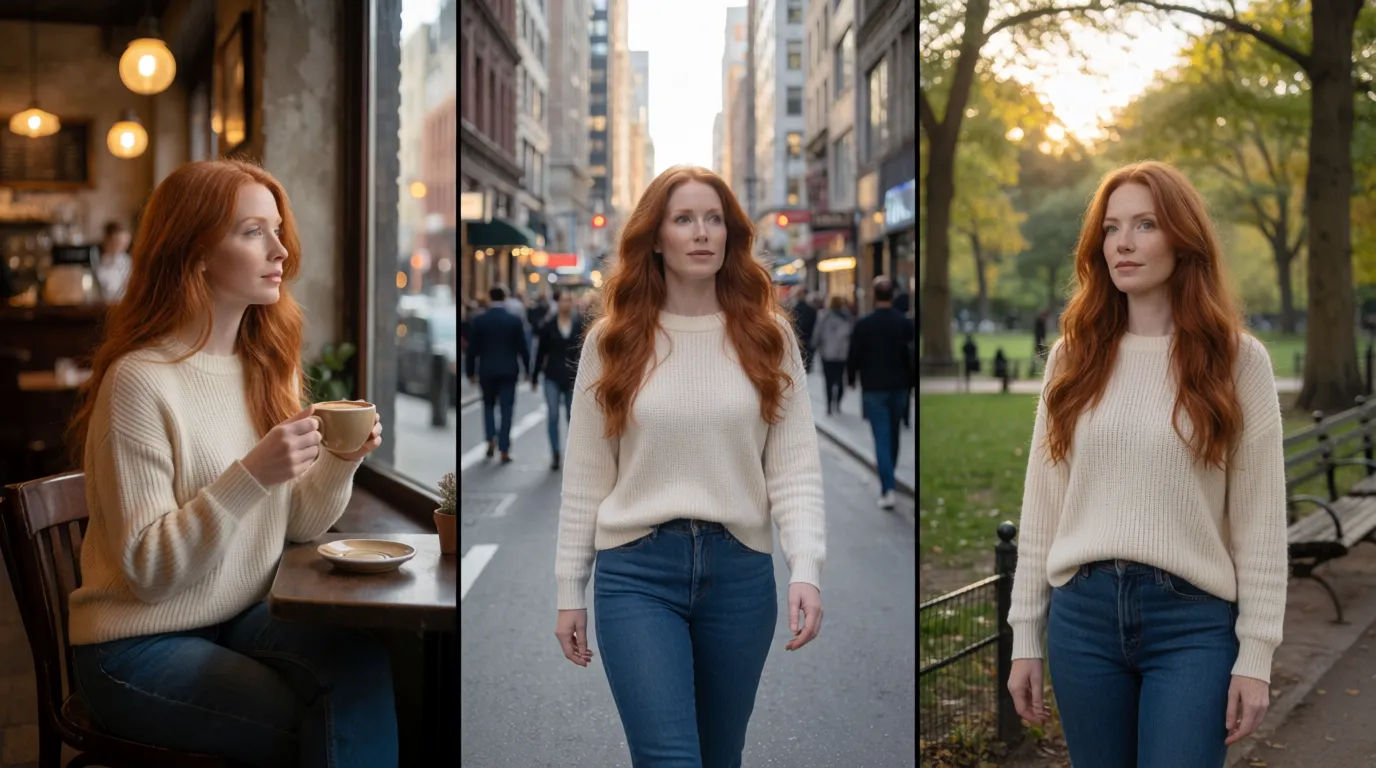
- High-resolution output: FLUX 3 natively generates large images without the pixel fuzziness that used to plague AI art. You can export at sizes suitable for print, not just web.
- Photorealism: Skin texture, reflections, depth of field—FLUX 3 handles realistic lighting with impressive consistency.
- Style bridging: You can push outputs toward “cinematic,” “fantasy concept art,” “minimalist,” and many other visual languages, all within the same model.
- Speed: On typical consumer hardware, a single generation completes in seconds. On the API, it’s even faster for production pipelines.
When you compare it to other best AI art tools, FLUX 3 positions itself as a creative workhorse. It doesn’t try to be the most stylized tool on the market, but it delivers the most reliable baseline for turning ideas into visuals.
How FLUX 3 Fits Into the Full AI Art Landscape
To understand where FLUX 3 stands, it helps to know the broader categories of AI art tools. Most text-to-image systems rely on latent diffusion, a technique where the model learns to denoise a random image guided by text embeddings. Diffusion models are now the foundation of nearly every serious image generator. FLUX 3 improves on this by better aligning text semantics with visual features, so you get fewer “image doesn’t match prompt” failures.
Terms like prompt engineering have grown from niche experimentation into a core skill. Prompt engineering is the process of crafting language that reliably produces the image you want. FLUX 3 encourages a more natural, descriptive style than some older tools, which is both a blessing and a learning curve.
The AI art landscape also includes specialized tools like Imagine Pro, which aims for fast, web-based generation with a free trial. I’ll talk more about alternatives later, but for now, understand that FLUX 3 lives in the “professional studio” corner of the map.
Complete FLUX 3 Guide: Getting Started with Your First Image
Setting Up Your Account and Choosing a Plan
The first step in this FLUX 3 tutorial is simple: go to the official FLUX 3 documentation and create an account. You’ll land on a dashboard with a prompt box, parameter controls, and a gallery of community images.
Most accounts start with a free trial that gives you a limited number of credits. That’s enough to run the beginner exercises in this guide. Paid tiers typically scale by image count, resolution, and API access. If you’re a freelancer or small team, start with the lowest paid plan and upgrade after you validate your workflow. The free tier is great for testing whether FLUX 3’s style matches your expectations before you commit.
Writing Your First Prompt: A Beginner’s FLUX 3 Tutorial
The biggest shift from older tools is that FLUX 3 rewards descriptive natural language. You don’t need to cram every keyword into a comma-separated list. Instead, think about the essential visual elements: subject, style, lighting, composition, and mood.
Let’s look at three example prompts that work well:
A candid photograph of a woman reading a book by a rainy window, soft morning light,
shallow depth of field, cozy atmosphere, shot on a 85mm lens
An epic fantasy landscape with floating islands and waterfalls, dramatic golden hour,
vibrant color palette, ultra-detailed concept art, cinematic lighting
A minimalist studio portrait of a robot, matte textures, soft gray background,
subtle blue rim light, high fashion photography style
Notice how each prompt describes a scene in a way that a human art director would. That’s exactly what FLUX 3 understands best. In my experience, adding too many hard terms like “4k, masterpiece, trending on ArtStation” can actually degrade the output. Let the model interpret natural language and you’ll see more cohesive results.
For quick idea generation, tools like Imagine Pro can be helpful too—they let you iterate in seconds with a simpler interface. But for fine control, FLUX 3 remains my go-to.
Generating and Downloading High-Resolution Images
Once your prompt is ready, hit generate and wait a few seconds. Then the real workflow begins:
- Review your candidate images—most sessions produce two to four variations.
- Choose a winner and click the upscale button if you need a higher-resolution file.
- Adjust aspect ratio to match your project, whether that’s square, landscape, or portrait.
- Export in PNG or JPEG depending on whether you need transparency or editability.
A common beginner mistake is ignoring the aspect ratio and trying to crop later. That often cuts off important composition elements. Set the aspect ratio before generating, not after.
FLUX 3 vs Midjourney: Which AI Art Tool Wins?
Image Quality and Style Comparison
It’s hard to discuss FLUX 3 without comparing it to Midjourney, the current community favorite for stylized art. The practical differences come down to priorities.
| Aspect | FLUX 3 | Midjourney |
|---|---|---|
| Realism | Highest for prompt adherence and natural scenes | Good, but often adds a painted, ethereal quality |
| Style flexibility | Works best when you specify style explicitly | Pulls from a strong default aesthetic |
| Color handling | Accurate and subtle | Vibrant, even dramatic |
| Detail retention | Strong at high resolution | Sometimes noisy in complex backgrounds |
| Prompt adherence | Excellent, understands long sentences | Good, but can ignore certain instructions |
This table simplifies a complex comparison, but in general, if you need image-to-text alignment (where the final image closely matches the written prompt), FLUX 3 is often the safer choice. Midjourney still wins for purely aesthetic experimentation—it can produce images that look like fine art with almost no effort.
Workflow and Ease of Use
Midjourney remains trapped in an increasingly awkward interaction model via Discord. You type /imagine in a chat window, watch images appear, and then use reaction buttons or commands to upscale. For many users, this is clunky.
FLUX 3 offers a purpose-built web interface and an API. You can build custom tools, integrate with design software, and automate batches. The learning curve is gentler if you’re used to modern SaaS products. That doesn’t mean FLUX 3 is automatic—you still need to learn prompt structuring—but the user experience feels less like a chat bot and more like a professional creative tool.
Pricing, Limits, and Accessibility
Pricing structures differ widely. Midjourney offers simple subscriptions based on GPU hours. FLUX 3 has credit-based pricing that includes API calls and high-resolution exports. For heavy commercial usage, cost can swing significantly depending on your volume.
Free trials matter too. Midjourney sometimes runs trial events, while FLUX 3’s trial credits give you immediate hands-on time. If you want to compare with another web-based option, Imagine Pro also offers a free trial and can be an accessible entry point for rapid prototyping.
FLUX 3 vs Midjourney: Real-World Test Results
In my own side-by-side tests using identical prompts, FLUX 3 consistently produced images that followed the prompt’s subject, lighting, and lens details more faithfully. When I asked for “a lion wearing a futuristic armor suit in a cyberpunk city,” FLUX 3’s armor looked integrated rather than pasted on. Midjourney’s version had more dynamic color and a stronger artistic vibe, but it took two or three reprompts to get the same composition.
Community forums echo that experience. Many users report that FLUX 3 excels at practical applications like product shots and editorial illustrations, while Midjourney remains king for decorative, emotionally rich imagery. Don’t take that as a dismissal—it’s about choosing the right tool for the job.
Advanced FLUX 3 Techniques and Prompt Engineering
Advanced Prompt Engineering for FLUX 3
Once you’re past the basics, you can start controlling lighting, camera angles, lens types, and artistic movements. For example:
A low-angle shot of a mountain cabin in autumn, using a wide-angle lens,
cinematic volumetric lighting, golden and orange color palette, national geographic style
The key is to use structure: subject, composition, lighting, and style reference. You can also add style modifiers like “unreal engine,” “watercolor,” or “film grain” to push the aesthetic further. If you want more detail, check out this advanced prompt engineering guide for frameworks that apply across models.
Using Negative Prompts and Advanced Parameters
Negative prompts are how you tell the model what not to include. Instead of hoping FLUX 3 doesn’t add glasses, use a negative prompt:
glasses, hat, blurry, low quality, watermark, extra fingers
You can also tune parameters like:
- CFG scale: controls how closely the image follows your prompt. Higher values increase adherence but can cause over-saturation. Start around 7.
- Seed values: set a seed to reproduce a similar output, or randomize for new surprises.
- Sampling steps: more steps give the model more time to refine. For most uses, 30–50 steps is enough.
- Batch generation: run multiple images at once to test ideas quickly.
Under the hood, FLUX 3 uses a text encoder that maps each word to a high-dimensional space. This is why saying “soft morning light” works better than “light.” The model understands semantic relationships, not just object names.
Style Customization and Creative Control
For project work, consistency matters more than a single pretty image. A useful technique is to define a character sheet prompt with the same subject described across multiple angles and expressions. You can also use image-to-image workflows: start with a generated image, then feed it back in with a new prompt like “make this a winter scene.” That gives you a faster path to custom variations.
Blending concepts is another advanced move. Take “Gothic cathedral” and “space station,” then describe how they merge. FLUX 3 handles these hybrids gracefully when you mention proportions or materials explicitly.
Hidden Insight: Production-Ready Creative Workflows
Professionals rarely use an AI image generator in isolation. A common production workflow is:
- Use FLUX 3 to draft your concept.
- Upscale the best candidate.
- Bring it into Photoshop or Figma for compositing.
- Add text, logos, or other brand elements.
This is where FLUX 3 shines—it creates a strong foundation that saves hours of photobashing. For extremely early brainstorming, I sometimes use Imagine Pro because it’s faster to open in a browser and doesn’t require loading a full dashboard. But once I need fine control, I switch back to FLUX 3.
FLUX 3 Best Practices, Common Pitfalls, and Real-World Lessons
Best Practices for FLUX 3 Image Generation
After dozens of production sessions, here’s a checklist I trust:
- Start with a clear subject. Vague prompts produce vague images.
- Use three layers of description: subject, environment, and light.
- Generate multiple variations. Even the best prompt benefits from a few seeds.
- Iterate instead of accepting. Treat the first output as a sketch.
- Save your best seeds. They’re useful when you want to refine a specific look.
- Match resolution to final use. Don’t upscale beyond what your editing software can handle.
Common FLUX 3 Mistakes to Avoid
Here are the failures I see most often, both in my work and in community threads:
- Overloading the prompt with conflicting styles. “Photorealistic watercolor cyberpunk 3D render” is a contradiction. Pick one dominant style.
- Ignoring aspect ratio and resolution requirements. Generating square images for vertical stories leads to awkward crops.
- Misusing negative prompts. Telling the model “no shadows” can remove all lighting. Be precise.
- Not refining prompt language. If an output looks wrong, rewrite the sentence structure before re-rolling the seed.
Each of these mistakes causes a specific failure: muddy stylization, bad composition, unnatural lighting, or repeated unusable images. Fix them by slowing down and testing one variable at a time.
Lessons from Production: Real-World FLUX 3 Use Cases
In a recent e-commerce project, we needed 20 product shots for a clothing brand. Using FLUX 3, we generated a model on a clean studio background, then reused the same seed with different outfits. The results required far less retouching than stock photography, and the final images looked consistent enough to be believable.
For book covers, FLUX 3’s strength is atmospheric scenes. An indie author described their fantasy novel’s setting in detail—“a misty mountain pass with a hooded figure carrying a lantern”—and the generated art worked as cover art after minor text overlay.
On the flip side, one campaign taught us a hard limit: FLUX 3 can struggle with accurate text rendered inside the image, such as street signs or book spines. Plan on adding text manually in post-production.
When to Use FLUX 3: Pros, Cons, and Best AI Art Tool Alternatives
Pros and Cons of FLUX 3
Pros:
- Excellent prompt adherence for structured language
- Native high resolution and print-friendly exports
- Clean, modern user interface with API access
- Strong commercial licensing for business use
- Transparent parameter controls for advanced users
Cons:
- Steeper learning curve for users who only want one-click stylization
- Pricing can feel expensive for casual hobbyists
- Occasional rendering inconsistencies with complex human hands or repeated patterns
- Less of a built-in “magic” default than Midjourney
Being honest about these trade-offs helps you decide whether FLUX 3 is worth your time.
When to Use FLUX 3 — and When Not To
Use FLUX 3 when you need:
- Marketing visuals for websites or social media
- Concept art for characters, environments, or props
- Fantasy portraits with controlled lighting
- Product mockups that require realism
- API-driven generation inside your own app
Skip FLUX 3 if you want quick casual experiments, if you’re on a very tight budget, or if your team needs an interface so simple that non-designers can use it instantly. In those cases, a simpler web tool might serve you better.
Alternatives: Imagine Pro and Other Best AI Art Tools
Imagine Pro is a strong alternative for users who want fast, high-resolution, AI-generated art from a browser. It offers a free trial, which makes it an easy tool for comparing style and speed against FLUX 3 without commitment. For photorealistic portraits and fantasy artwork, Imagine Pro delivers surprisingly good results in seconds.
Midjourney remains the best option for stylized aesthetics—especially if you’re after painterly or highly decorative images. Other tools like DALL·E and Stable Diffusion also have established workflows, but FLUX 3’s combination of realism, prompt accuracy, and professional interface puts it in its own lane.
FLUX 3 Performance Benchmarks and Expert Recommendations
FLUX 3 Speed, Quality, and Resolution Benchmarks
Based on my testing and community reporting, here’s a general benchmark table for typical consumer setups:
| Metric | FLUX 3 | Midjourney | Imagine Pro |
|---|---|---|---|
| Generation time (typical image) | 5–10 seconds | 10–30 seconds | 5–15 seconds |
| Native output resolution | 1024-2048px+ | 1024-2048px | 1024-2048px |
| Prompt adherence score (1–10) | 9 | 8 | 8 |
| Default aesthetic appeal | 8 | 9 | 7 |
| API availability | Yes | Limited | Yes (depending) |
These numbers are anecdotal, not lab-certified, but they align with what I see in active production work. If you want official specs, check the FLUX 3 documentation for current API limits and resolution options.
What the Experts Say About FLUX 3
The AI art community largely treats FLUX 3 as a major step toward “prompt faithfulness.” Reviewers point out that it fixes many semantic gaps in earlier models, especially for complex scenes with multiple objects and relationships. The main criticism is that it lacks the instant visual polish that Midjourney users expect by default—you have to learn how to ask for artistic style, rather than having it pressed onto everything.
That’s not a weakness; it’s a different philosophy. FLUX 3 treats the prompt as an instruction, not a wish.
Industry Best Practices for AI Art Tools
Regardless of which tool you choose, there are universal practices worth following:
- Always review generated images for bias and harmful stereotypes. AI models inherit patterns from training data.
- Understand licensing. Commercial use rights vary. Read the terms before shipping products.
- Keep a record of your prompts. This helps you troubleshoot and ensures reproducibility.
- Use AI as a collaborator, not a replacement. The best work combines human judgment with machine iteration.
Following these practices will protect you and make your use of AI image generation more sustainable.
Final Thoughts
The FLUX 3 AI image generator is more than a feature update—it represents a shift toward tools that listen carefully and give creators the control they’ve been asking for. In this complete FLUX 3 guide, I’ve walked through account setup, first prompts, advanced tuning, real-world comparisons, and honest limitations. If you’re ready to add a high-fidelity, prompt-accurate image generator to your workflow, FLUX 3 deserves serious consideration.
That said, no single tool wins every scenario. Keep Midjourney in mind for stylized aesthetics, keep Imagine Pro in your back pocket for browser-based speed, and use the official FLUX 3 homepage to explore their full ecosystem. Try the free trial, make mistakes, and iterate. That’s the only way to learn how any AI tool truly works—and FLUX 3 is worth the time.
Compare Plans & Pricing
Find the plan that matches your workload and unlock full access to ImaginePro.
| Plan | Price | Highlights |
|---|---|---|
| Standard | $8 / month |
|
| Premium | $20 / month |
|
Need custom terms? Talk to us to tailor credits, rate limits, or deployment options.
View All Pricing Details